Looking for an easy way to keep in touch with website visitors? This tutorial will walk you through how to set up a newsletter on WordPress.
Email marketing helps you connect with online visitors. It’s a great way to build an audience, whether you’re a blogger or an ecommerce store. But when it comes to growing your newsletter subscriber list, how do you know where to start?
It’s easy to set up newsletters for your WordPress website. Usually, all you need is a newsletter plugin like Brevo. Simply add it to your website to collect email subscribers and reach a wider audience.
See for yourself in this step-by-step tutorial. We’ll show you how to create a newsletter on WordPress using Brevo. Read on to find out more.
Table of contents
Why you need a newsletter for your WordPress website
WordPress email newsletters are a great way to turn website visitors into loyal subscribers. Newsletters can help you:
- Create lasting relationships, starting with welcome emails to new subscribers
- Engage leads with targeted content
- Drive traffic back to your website with new post notifications and blog updates
- Boost conversions with sales and promotions
Discover the best email newsletter examples for inspiration.
How do WordPress newsletters work
To set up a newsletter for your WordPress website, you need the following:
- A drag and drop tool to design and send your newsletters
- A newsletter subscription form to save visitors’ contact information
Both are available through a plugin or an email service provider. For beginners, it’s best to use a WordPress newsletter plugin. They allow you to build eye-catching popups and contact forms. That makes them the perfect tool for email list building.
When it comes to choosing a plugin, you’ll find dozens of options. Some email marketing platforms offer their own plugins. Others are designed specifically for WordPress.
Popular plugins include MailPoet and Newsletter. Brevo is another user-friendly WordPress plugin with email marketing functionality.
How to set up an email newsletter on WordPress with Brevo
Follow these steps to set up your newsletter on Wordpress.com using Brevo’s plugin
1. Install the Brevo WordPress newsletter plugin
First, install the plugin by following these steps:
- Log in to your WordPress dashboard as an administrator.
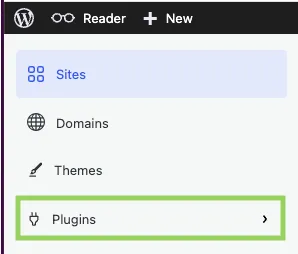
- Go to Plugins in the sidebar menu, then Add New.
- Search Brevo to find the plugin Newsletter, SMTP, Email marketing and Subscribe forms by Brevo.
- Click on Get Started.
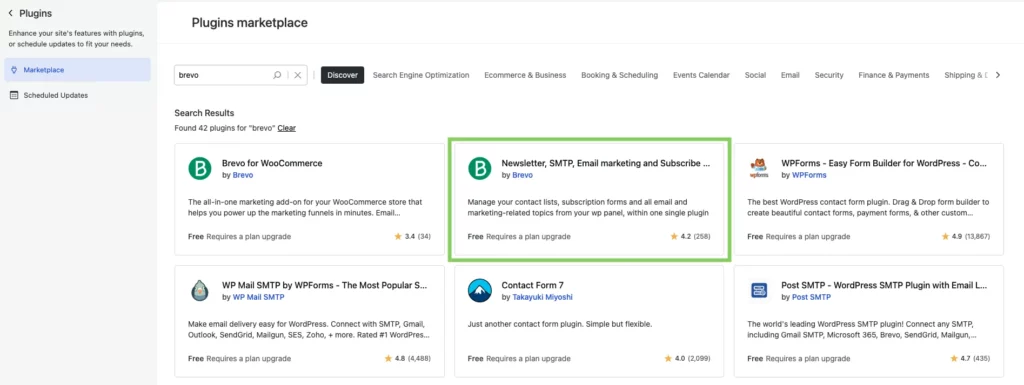
Once installed, the Brevo tab will appear in your WordPress sidebar menu. Click on it to continue with the plugin setup.
2. Connect your website to Brevo
Now that you have installed the plugin, connect your WordPress website to Brevo:
- In the sidebar menu, go to Brevo, then Home.
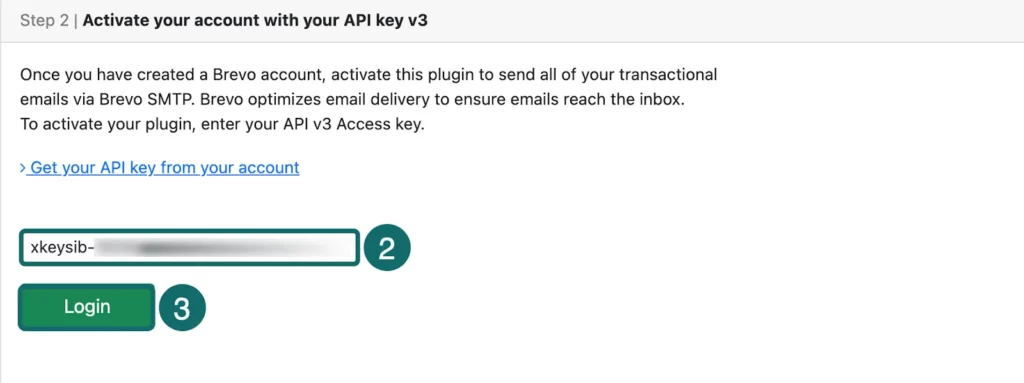
- In the Access Key field, enter your API v3 key. Follow these instructions to find your API key in your Brevo account.
- Click Login.
Don’t forget to synchronize your WordPress contacts
The synchronization of existing WordPress contacts is not automatic. To do this manually, click on Brevo in the sidebar menu. Then click on Sync my users. This will synchronize your WordPress email contacts with your Brevo account.
3. Add a newsletter subscription form
The next step is to add an email subscription form to your WordPress site. This form will let site visitors opt-in to receive your newsletter. The easiest way to create a subscription form is with Brevo’s form builder.
First, use the form builder to create an email signup form. Customize the form fields and design with the drag-and-drop editor. Or, edit the HTML & CSS directly.
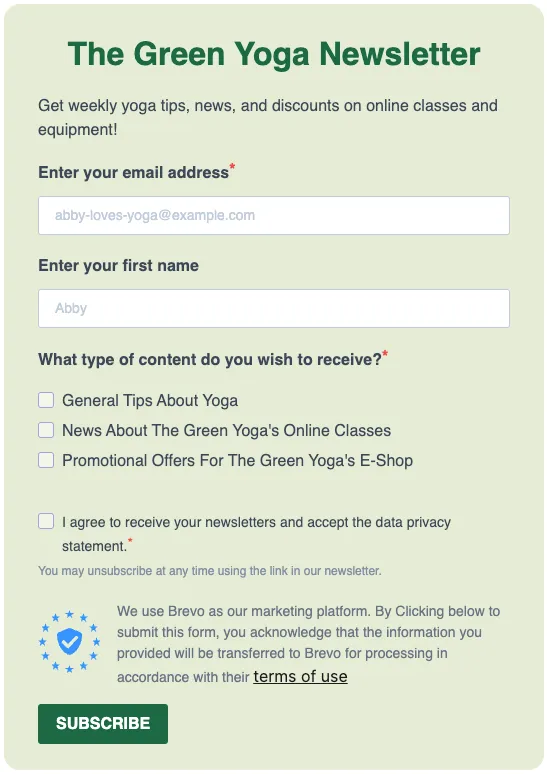
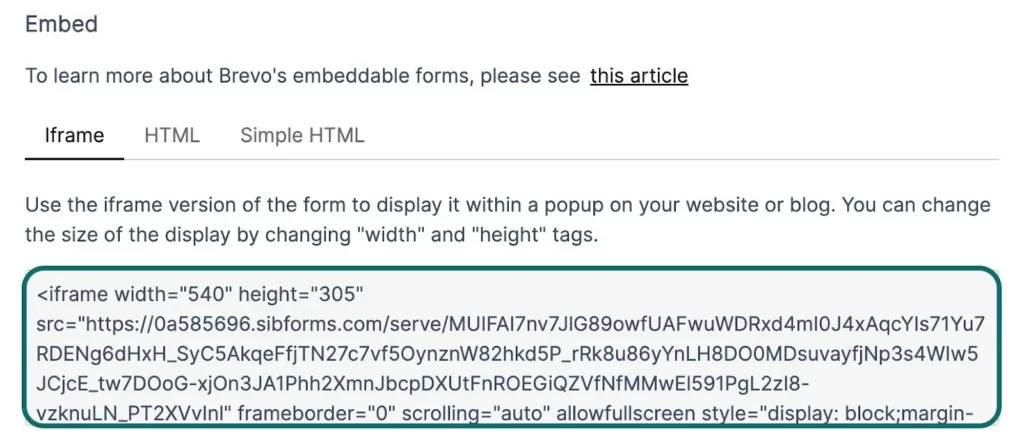
Next, embed your Brevo newsletter subscription form on your WordPress website. It’s usually best to use an Iframe. Simply copy and paste the code to embed it within a website page.
4. Create your newsletter campaign
Send your subscribers an attention-grabbing newsletter with Brevo.
Here’s how to create a newsletter in WordPress using the Brevo platform:
- Go to your Brevo account dashboard.
- Click on Create an email campaign.
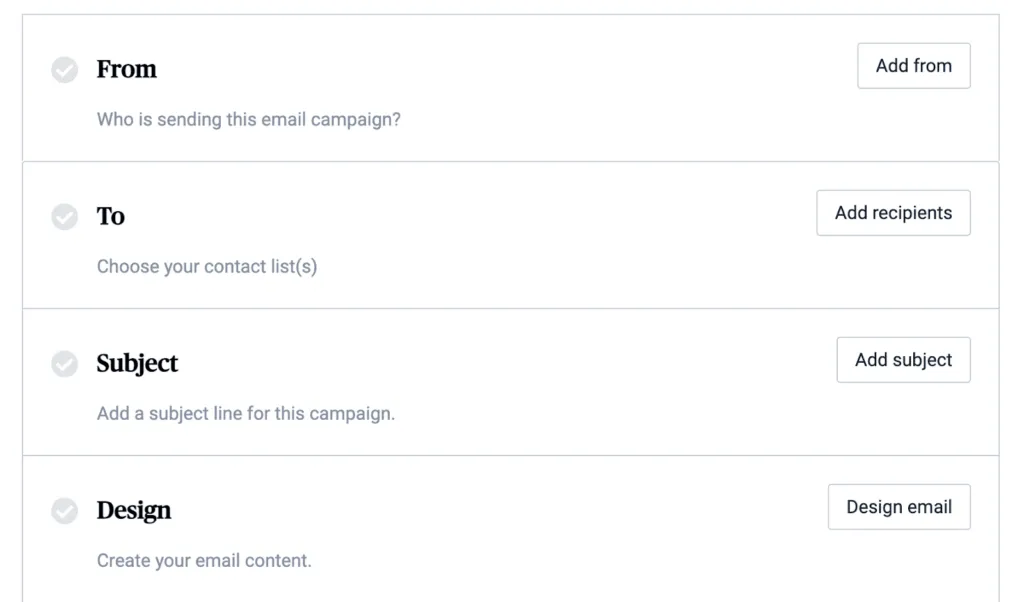
- Fill out the campaign details, such as the campaign name, contact list, and subject line.
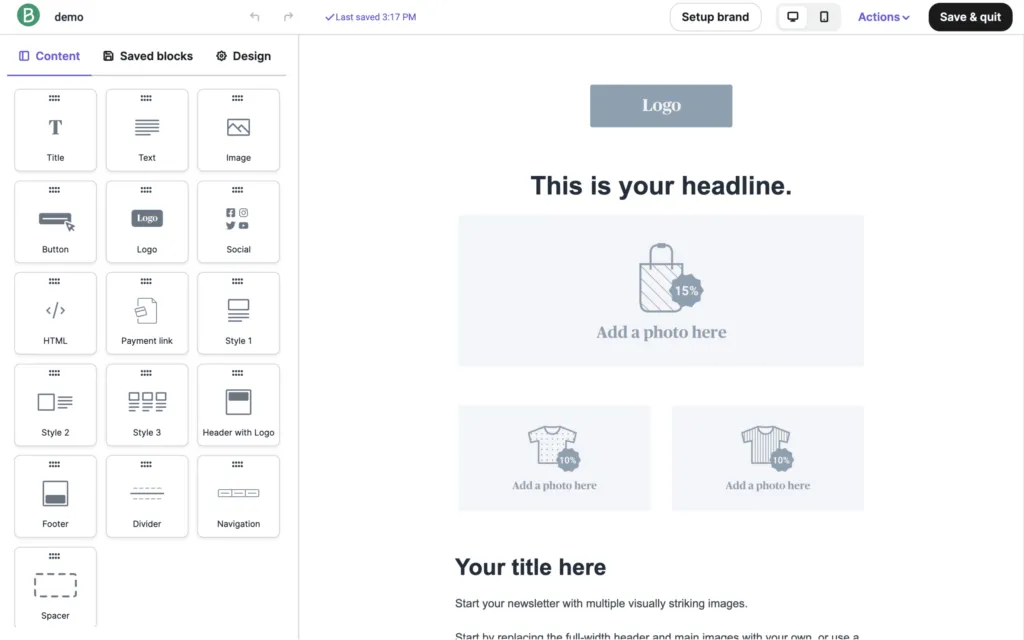
Start with a pre-made newsletter template. Or, use the drag-and-drop editor to create responsive HTML emails — no coding skills needed. Simply build your newsletter with the ready-to-use blocks. Don’t forget to add in your email copy and customize the layout.
5. Monitor your campaign results
After you send your newsletter, it’s important to monitor its performance. Use the WordPress plugin to check key metrics (open rates, clicks, unsubscribes, and bounces).
Here’s how to access your email campaign statistics:
- In the sidebar menu, go to Brevo, then Statistics.
- Set up a time period.
- Click Apply.

Use this data to study what kind of content works best for your subscribers. Tracking your newsletters’ performance can also help you troubleshoot issues and optimize your email marketing strategy.
Further reading: The Best Free and Paid WooCommerce Newsletter Plugins
Create a newsletter for your WordPress website with Brevo
Ready to get started with your WordPress newsletter? Brevo’s plugin offers all the email marketing features you need.
The free plan includes 300 emails per day, customizable signup forms, and 40+ free newsletter templates. Join Brevo and send your first WordPress newsletter today.


