
Tired of having your WordPress emails land in the spam folder? Or worse, not deliver at all? It’s about time you made the switch from WordPress’ default mailer to a dedicated free SMTP server like Brevo and improve your email deliverability from your WordPress site.
Luckily, there are lots of WordPress SMTP plugins that let you configure WordPress SMTP settings without touching a single line of code. Simple mail transfer protocol (SMTP) is how emails are sent from one person to another. This protocol relies on authentication checks to get your email past a receiving party’s email service provider’s (think Gmail, Yahoo.) spam checks and into the inbox.
At Brevo we’ve developed a custom WordPress email plugin that enables SMTP for transactional emails. It only takes one simple click to automatically override WordPress’ default PHP mail function, wp_mail().
But for once, we’re not here to talk about our own plugin. Instead, we’ll be looking at one of the most popular third-party plugins: WP Mail SMTP.
WP Mail SMTP by WPForms is installed on over two million websites worldwide. And best of all, it works alongside Brevo SMTP.
So if you want your WordPress emails (contact form, user notifications, password resets) to actually make it to the inbox, stay tuned. We’ll show you exactly how to configure WP Mail SMTP settings for Brevo in this brief tutorial, sharing some email delivery best practices as we go.
Ready? Let’s dive in.
Table of Contents
How to set up the WP Mail SMTP plugin for use with Brevo
PLEASE NOTE Brevo is unable to provide customer support for WP Mail SMTP as this plugin is developed by a third party. Should you experience issues with the plugin itself, please contact the WP Mail SMTP support team . As always, we remain available for questions related to the Brevo platform.
1. Create a free Brevo account
First things first, let's get you up and running on Brevo. Start by creating a free account using the link below. It’s quick and easy, no credit card required.
You'll be asked to verify your email address and provide some basic information about your business. Then you'll be invited to choose a plan.
Our free plan allows for 300 emails a day which is usually plenty for a small business or blogger starting out on WordPress.
Good to know: All new Brevo users go through an account validation process which is mostly automatic. Chances are you won’t even notice it. However, some accounts need to undergo manual validation. Don't worry though, the process will be completed within 24 hours (and usually much faster than that).
Once your account's created and the profile information added, you'll arrive on the Brevo dashboard.
Welcome!
2. Verify your domain on Brevo
The next thing you need to do is verify your domain on Brevo. This way you'll be able to electronically sign emails with your domain name (highly recommended, by the way). In email terms we refer to this as the DKIM signature.
DKIM (DomainKeys Identified Mail) is an email security protocol that proves to internet service providers (ISPs) you’re a trusted sender. Authenticating your top-level/apex domain with Brevo will help prevent emails landing in the spam folder
You can use a DKIM record generator to create records that store the DKIM public key — a randomized string of characters that is used to verify anything signed with the private key.
Or you can have it done directly in Brevo. Open the settings menu in the top right corner and select 'Senders & IPs'.
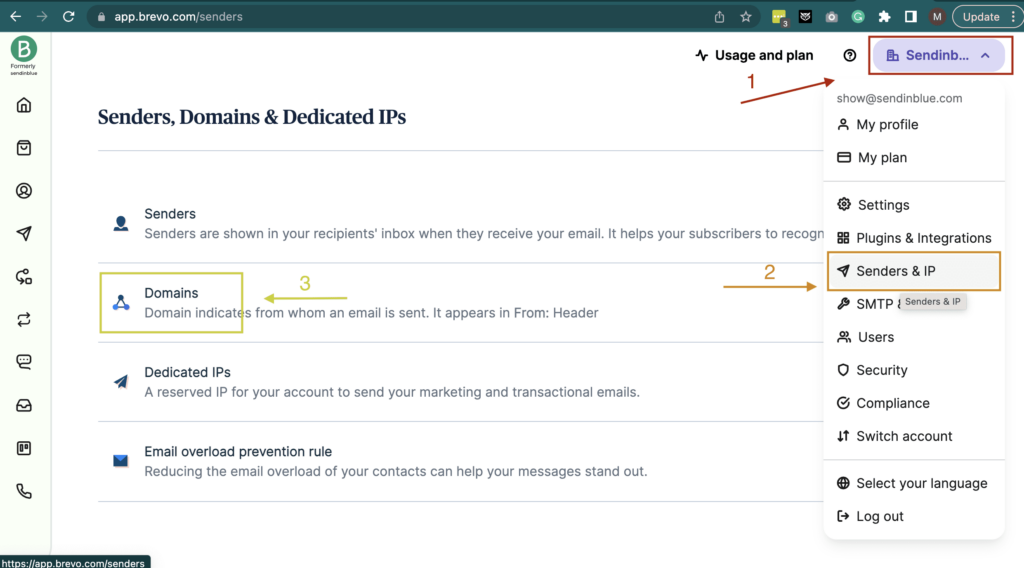
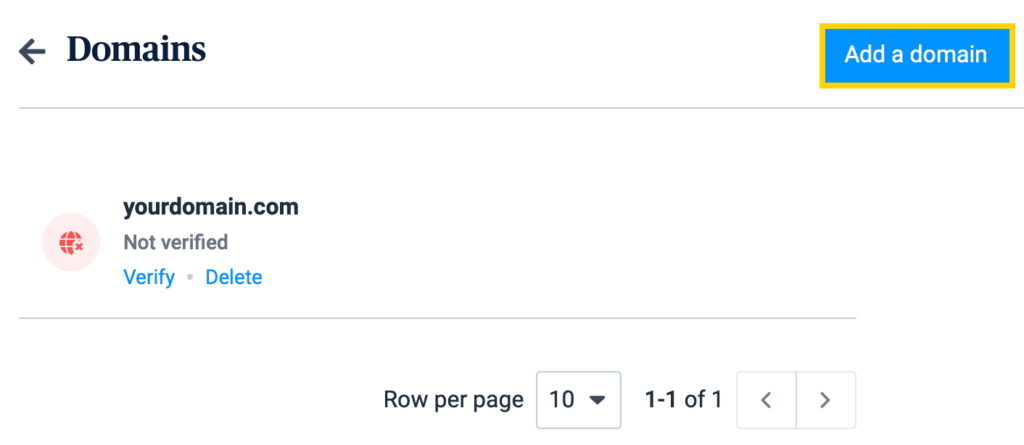
Go to 'Domains' and click 'Add a new domain'.
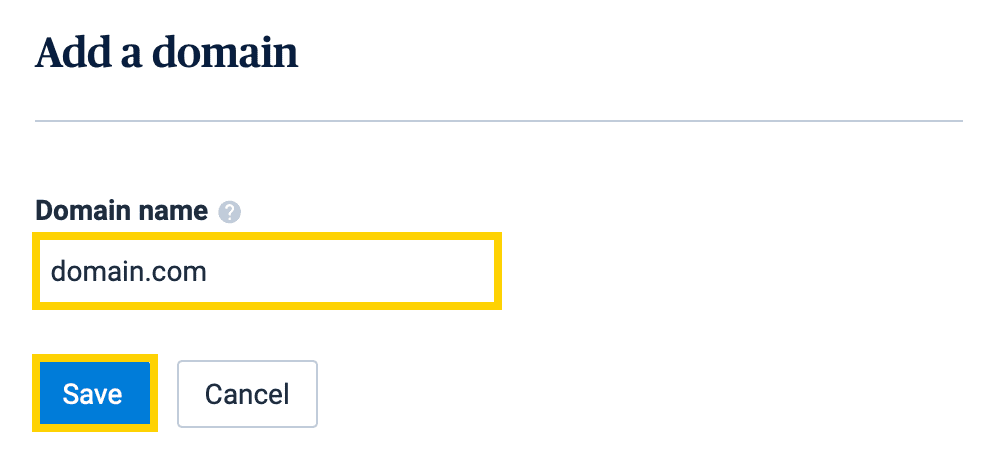
A pop-up will appear. Enter your domain name in the format exampledomain.com without the https:// or www.
Tick the box 'I would like to use this domain name to sign my emails' and then hit 'Save'.
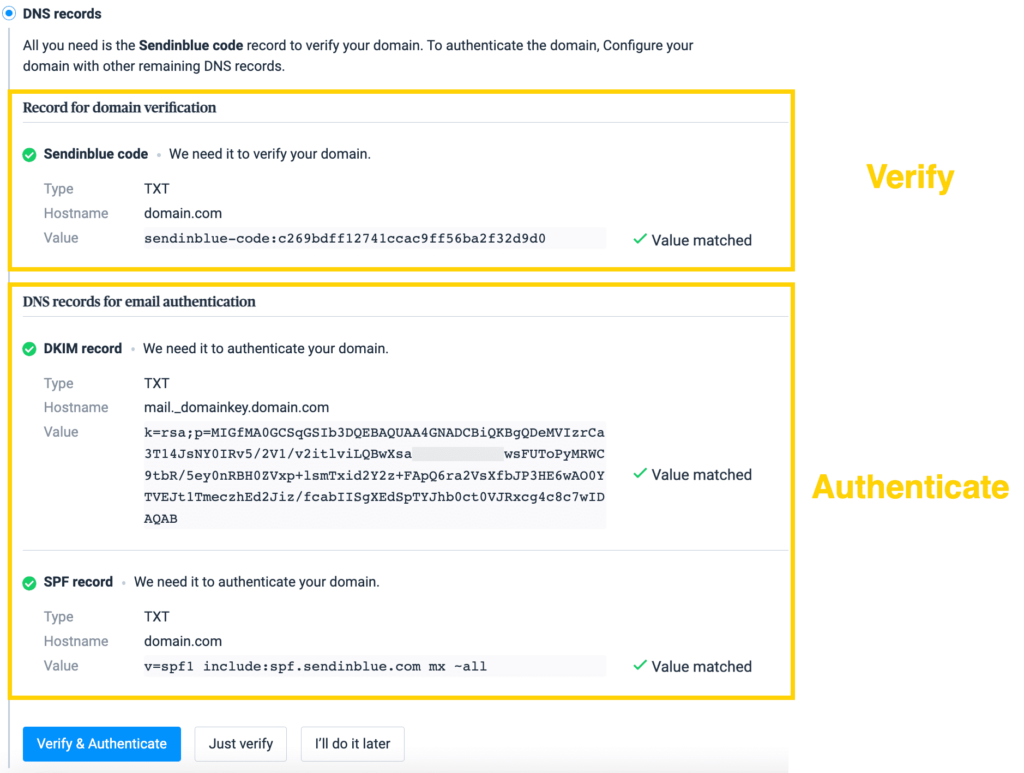
Once saved, a new window will appear with a number of TXT files. These need to be added to the DNS records on the cPanel of your web hosting account.
Some popular WordPress hosting providers are GoDaddy, Bluehost, OVH, Namecheap, and Siteground.
In a separate browser window, log into your hosting account (the web host where your website was made) and find where to add TXT records. This process varies among hosting providers but here are links to information for the most common ones.
Once you've uploaded the TXT records to the DNS, go back to Brevo and check if they've been configured by clicking 'Record Added. Please verify it.'
A verified TXT record will display the text 'Configured' in green (see image above).
❗ If nothing happens, don't worry. DNS changes can take 24-48 hours to fully propagate. You'll just need to check again later.
3. Add your 'Sender' information
The next step in customizing your email signature is to add your Sender information. This refers to the From Name and From Email your email recipients will be able to see.
Don't skip this step—sender name plays an important role in whether your email gets opened or not.
It should be something that's easily recognized in the inbox (for pointers be sure to check out our article on sender name best practices).
In the 'Senders & IPs' section once again, select 'Senders'.
Here you'll see the email address used to create your Brevo account. This can't be deleted but you can, of course, add multiple custom addresses associated with your domain.
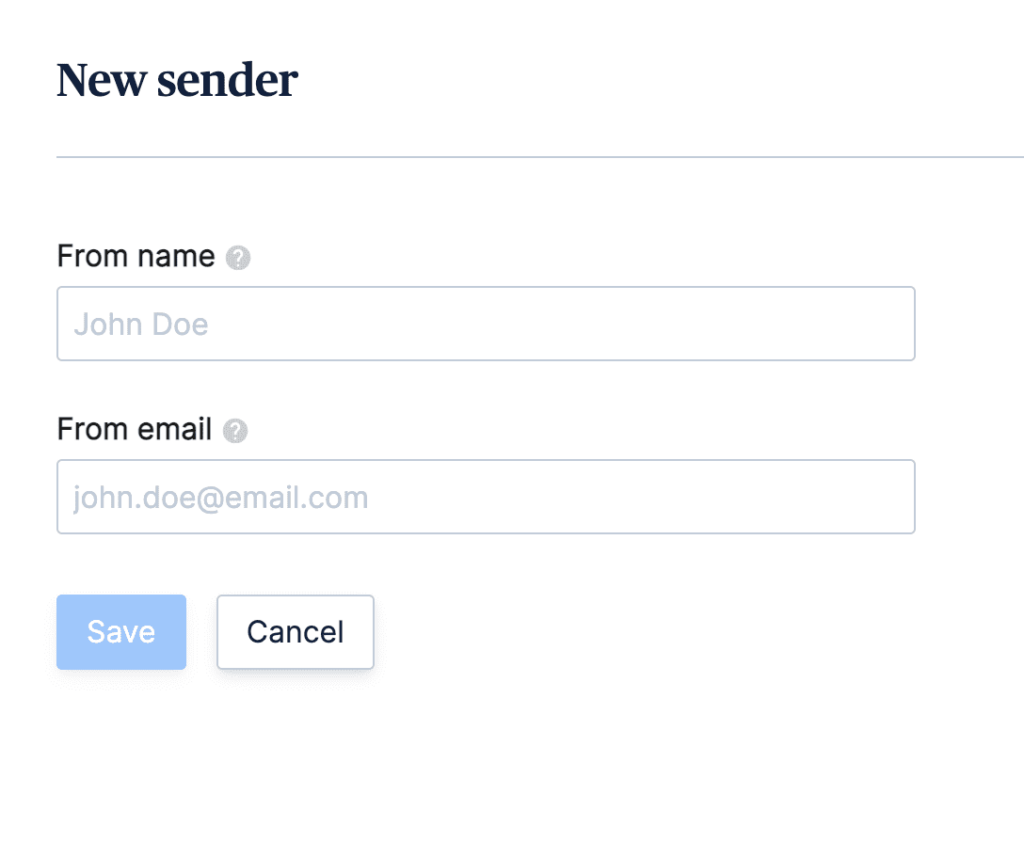
Select 'Add a new sender'.

Insert the From Name and From Email, then hit 'Save'.
We'll send a verification email to the address you specified.
And with that, your DKIM signature will be fully set up for best results.
Now let's head on over to WordPress and set up the WP Mail SMTP plugin.
4. Download the WP Mail SMTP plugin on WordPress
Log into your WordPress admin dashboard. Go to 'Plugins', 'Add New', then search for WP Mail SMTP in the plugin directory.
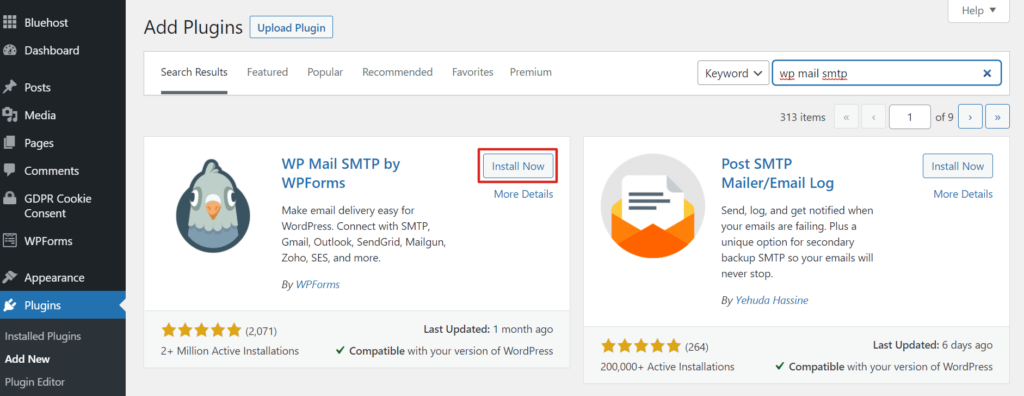
Install and activate the WP Mail SMTP plugin.
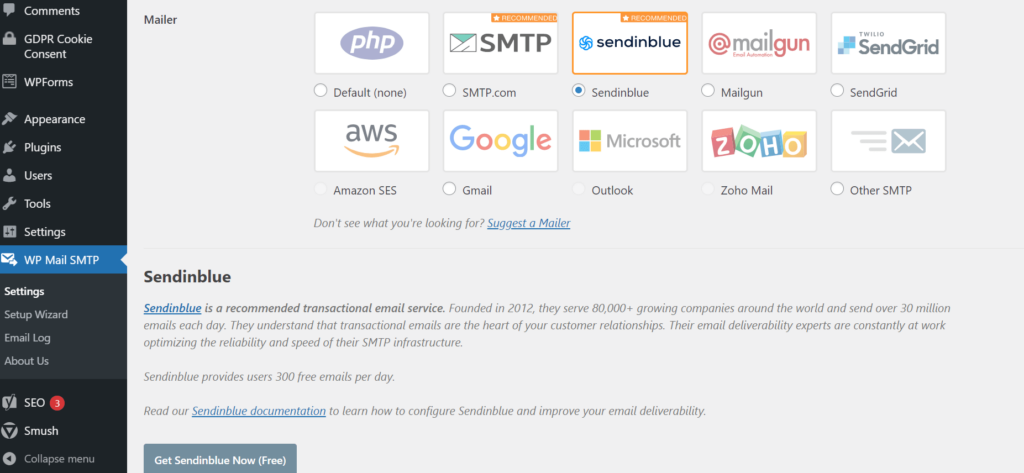
To configure the settings to send email with Brevo, go to WP Mail SMTP on the WordPress dashboard.
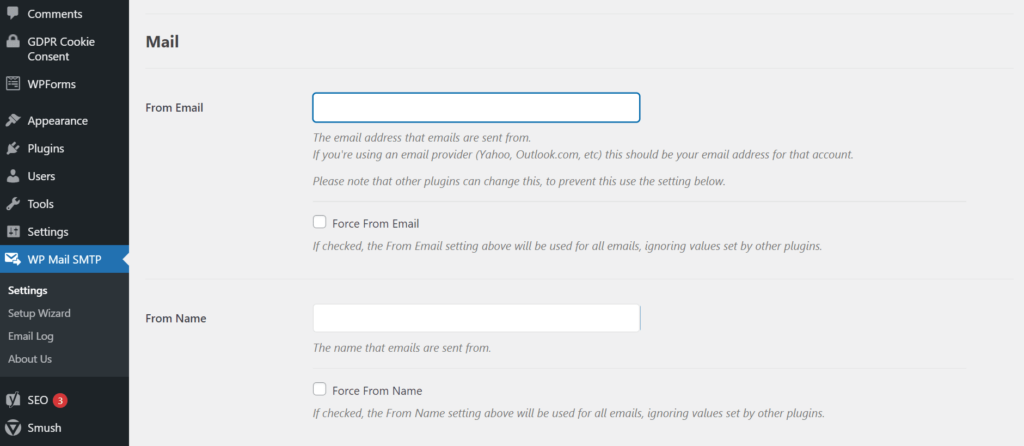
Enter the email address and sender name your site's emails will be sent from (i.e. the sender you added to Brevo in step 3).
You may choose to force emails to use this From Email and From Name. This allows WP Mail SMTP to override settings from other plugins like WPForms.
Check the box to set the return-path to match the From Email. This way your non-delivery notifications will have a place to go.
The next step is choosing a Mailer. Select Brevo (note, WordPress might still list Brevo as Sendinblue).
You’ll then be required to enter an API key and Sending Domain (i.e. the domain you just authenticated on Brevo).

To grab your API key, pop back over to the Brevo dashboard and go to SMTP & API.
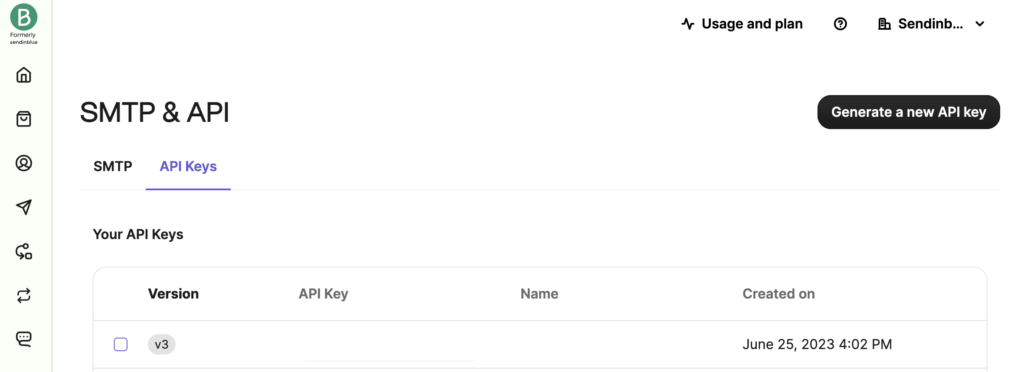
Copy and paste the API key into the WP Mail SMTP settings and click 'Save Settings'.
Good to know: The Brevo SMTP mailer uses API keys for enhanced data security. This means WordPress will never ask for your Brevo login credentials, creating an extra wall of protection for your data.
5. Send a test email
Almost there!
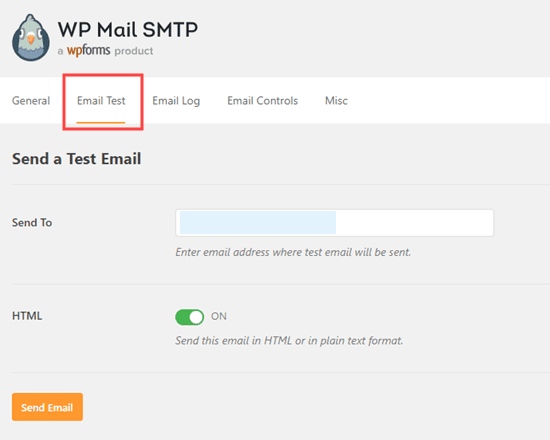
Finally, send a test email to make sure everything's working properly.
Select 'Email Test' on the WP Mail SMTP dashboard, enter the recipient email address, and click 'Send Test'.
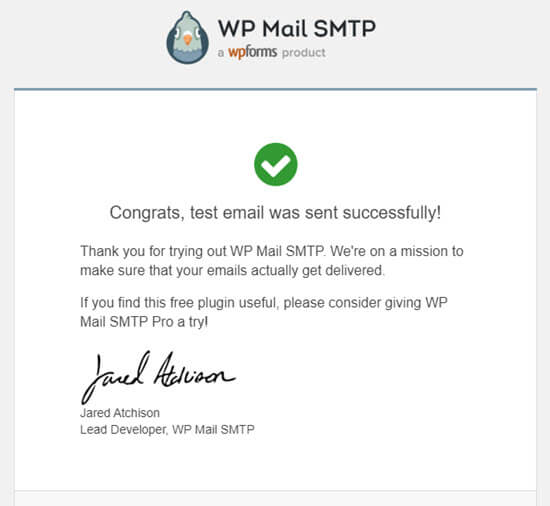
If the email is sent successfully, you'll receive the following confirmation email.
And that’s that! Now you can start using WP mail SMTP with Brevo. To unlock more features like email logs and advanced reporting you can upgrade to WP mail SMTP Pro.
Are there other SMTP services?
Definitely!
WordPress’s top three are:
Sendinblue (now Brevo) SMTP
SendLayer
SMTP.com
Other options include:
Sendgrid
Mailgun
Zoho Mail
Amazon SES
Other SMTP
Each one has its own set of integrations for WordPress, read more for an in-depth comparison of the best free SMTP servers.
The easiest way to send emails from your WordPress site
Rather than install a plugin for a plugin, you can just integrate Brevo with your WordPress site. By connecting just the Brevo plugin, you connect the entire Brevo CRM suite to your website.
What are the benefits of using Brevo for WordPress?
- Transactional emails are sent via Brevo’s server, meaning you never have to worry about your web host blocking your SMTP port
- Brevo’s free SMTP relay increases your deliverability of transactional emails with authentication checks and rigorous backend maintenance of the server
- You can easily customize and personalize your WordPress emails
- Signup forms are available for your WordPress website to turn visitors into contacts
- Brevo provides campaign performance analytics
- You will gain access to Brevo’s full CRM functionalities, from email campaigns to meetings and contact management
TLS encryption is used to protect your communications
Start sending WordPress emails with WP Mail SMTP and Brevo
You’re all set! Now you can send WordPress contact form emails, user notifications, and other transactional emails over Brevo’s SMTP relay.
No more worrying about legitimate emails ending up in the spam folder. Plus, Brevo’s analytics provide detailed statistics on email performance, including delivery rates, opens, and clicks.
Thinking about launching a newsletter or email marketing campaign? As a user of both WordPress and Brevo, our WordPress email plugin is the best way to get the most out of all our platform features.
You’ll be able to install WordPress email subscription forms, sync lists, and campaigns through your WordPress dashboard, and more. Be sure to check it out.


