
This guide will walk you through how to send mass email in five different ways — along with what each method can (and can’t) do.
Sure, you can send mass emails through Gmail or Outlook, but they weren’t built for it. You’ll quickly hit limits on how many emails you can send, and it’s easy to get flagged as spam.
If you want better deliverability, tracking, and fewer headaches, there are smarter ways to do it. In this guide, we’ll guide you through the five options to send mass email — from using your regular inbox to dedicated email marketing platforms.
Table of contents
How to send mass email in 5 ways
Whether you're sending a one-time email blast from Gmail or Outlook or setting up a campaign through an email marketing platform, we’ve got you covered.
1. How to send mass email in Gmail using BCC
The method is best for: Small, informal messages to a handful of people
Limitations: No personalization, no tracking, not scalable
Gmail’s BCC (blind carbon copy) field lets you send the same email to multiple recipients while keeping their addresses hidden. It’s very simple, but very limiting.
Anyways, if you just need to send up to 500 emails to external recipients (though Google recommends keeping it closer to 100), and you’re doing it as a one-off, the BCC method will cut it.
Here’s one way to do it:
- Step 1: Open Gmail and start a new message.
- Step 2: Click “BCC” and paste the list of recipients.
- Step 3: Write your message and hit send.
There’s also another way to do it. Instead of pasting a bunch of email addresses every time, you can use a contact label, which is a better option if you plan to email this group more than once:
Step 1: Create a new contact label
Go to Google Contacts, select the people you want to email, and click the “Label” icon. Create a new label (e.g., “Newsletter List”) and apply it to all selected contacts.

This way, you won’t need to paste dozens of email addresses manually every time.
Step 2: Compose your email
Head back to Gmail and click “Compose” to start a new message. Write your subject and message content.
Step 3: Add your contact label to the BCC field
Click “BCC” and type the name of your contact label. Gmail will automatically populate the BCC field with everyone under that label.
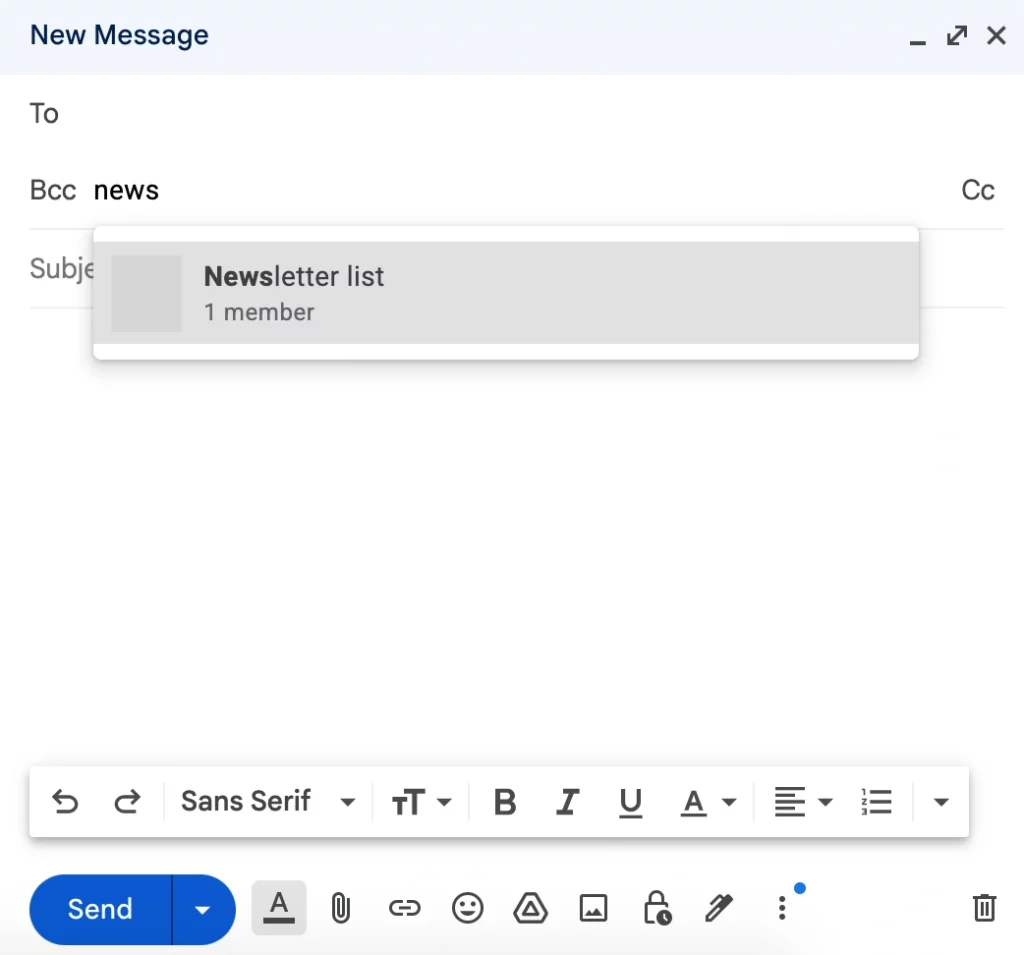
Hit “Send,” and your message will land in each recipient’s inbox without exposing your full contact list.
2. How to send mass email in Gmail using built-in mail merge
The method is best for: Personalized messages to a small-to-medium list
Limitations: Limited formatting and tracking
Gmail’s built-in mail merge (only available on Google Workspace) lets you send personalized emails right from the compose window.
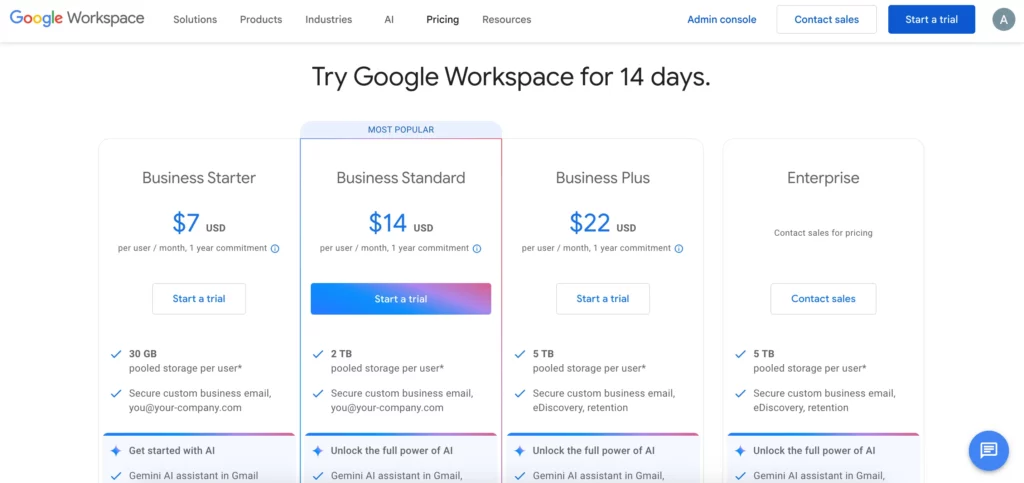
Step 1: Get a Google Workspace account
First, you need a paid Google Workspace account (all plans will work except for Business Starter).
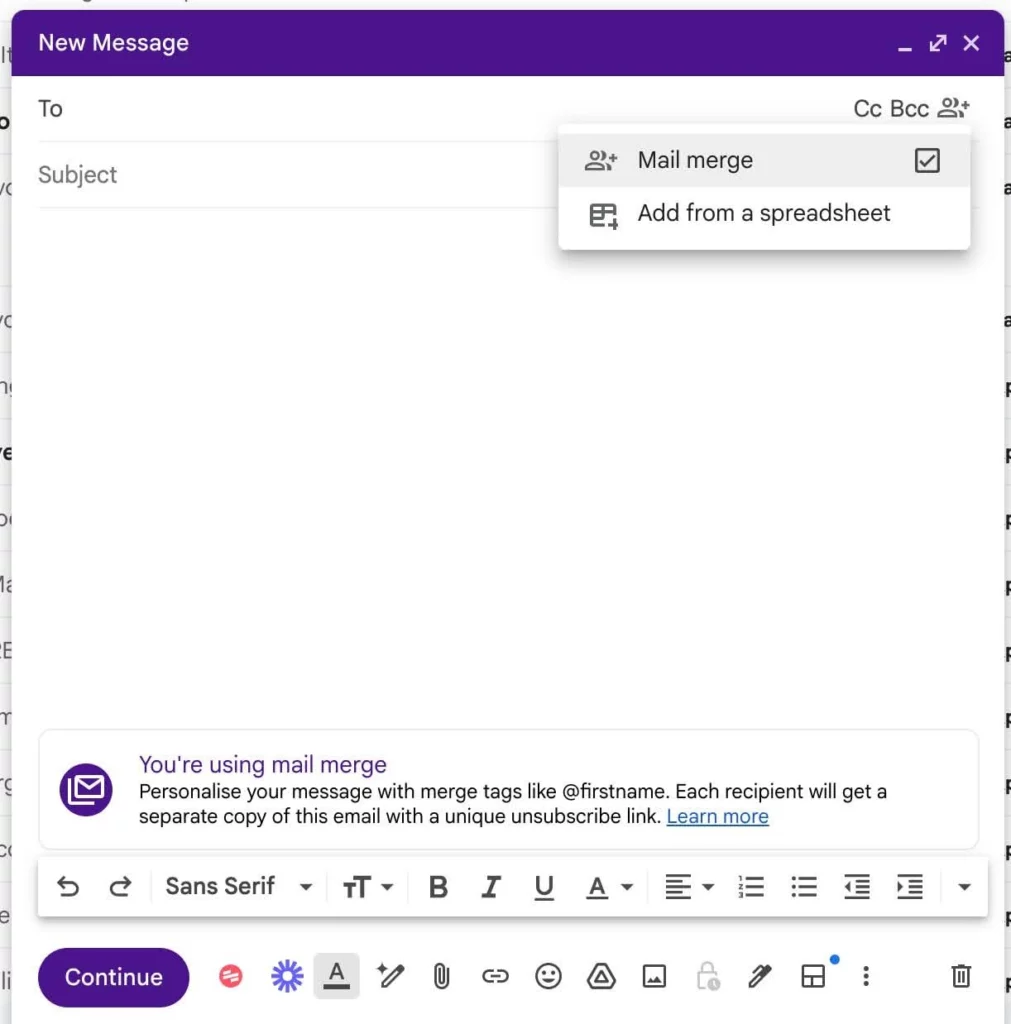
Step 2: Open a new email in Gmail
In Gmail, click “Compose”, then click the three-dot menu and select “Mail Merge.”
Step 3: Add recipients
You can manually add recipients or use a Google Contacts label you’ve already set up.
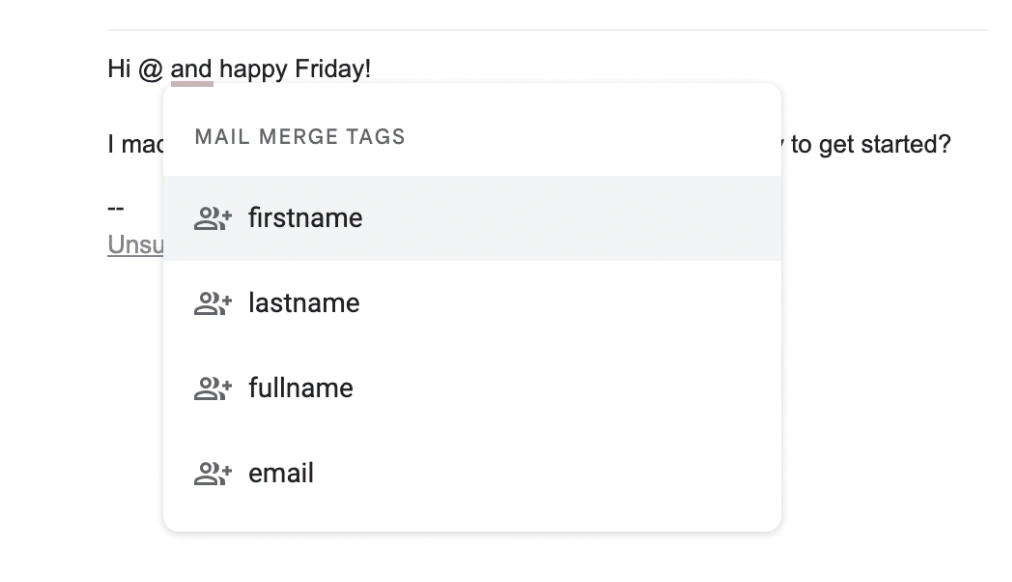
Step 4: Personalize with mail merge Tags
Use variables like @firstname to insert dynamic content into the subject line or message body. Gmail will pull the info from your contact records.
Step 5: Send your message
Review the preview, then hit Send. Each recipient gets a custom version of your message.
Related: How to Send Mass Email in Gmail
3. How to send a mass email in Gmail using a third-party mail merge
This method is best for: Sending more advanced campaigns with tracking, scheduling, and templates
Limitations: Free tiers have sending limits; setup may take a few minutes
If you want to send personalized emails from Gmail with some personalization and tracking — but don’t have a Google Workspace account — you can do it with a third-party add-on like GMass or Yet Another Mail Merge (YAMM).
Here’s how it’s done with GMass.
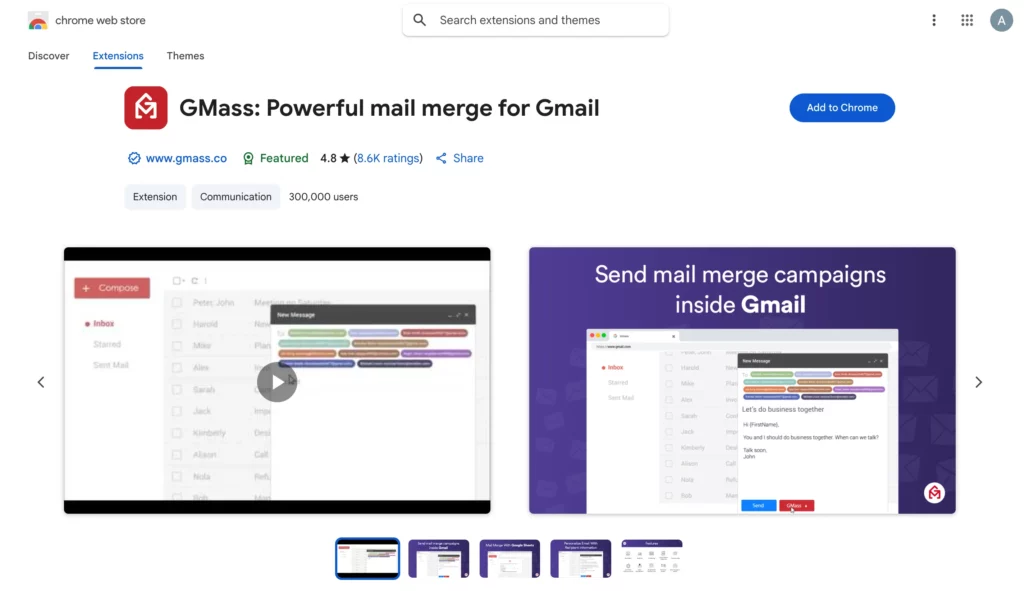
Step 1: Install GMass
Head to the Chrome Web Store and install the GMass extension. Once it’s installed, you’ll see a small GMass button in your Gmail compose window.
Step 2: Connect GMass to Gmail
Authorize GMass to access your Gmail account. This enables it to send emails on your behalf and connect with your Google Sheets.
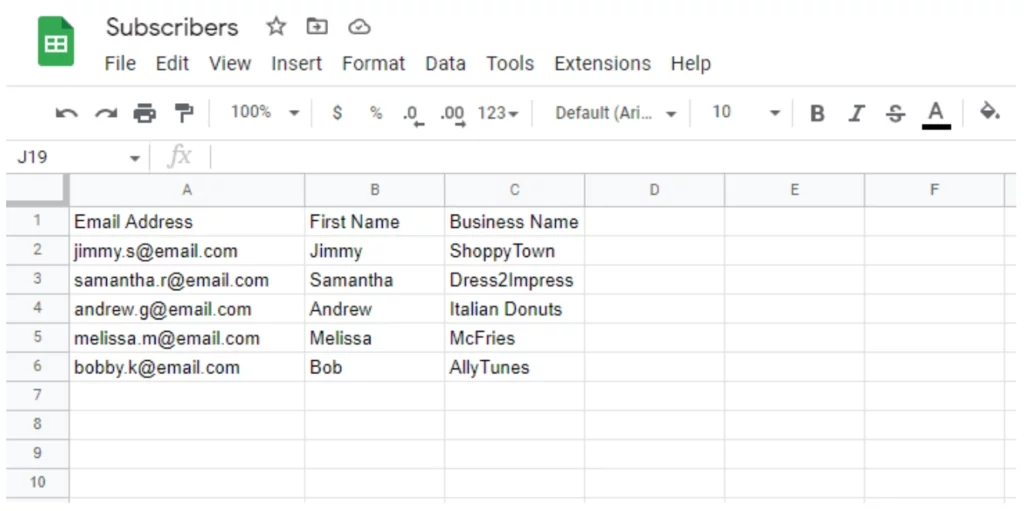
Step 3: Prepare your contact list
Create a Google Sheet with your recipients. At a minimum, include a column for email addresses. You can also add columns for first names, company names, or other fields you'd like to personalize.
Step 4: Compose your email
In Gmail, click “Compose” to start a new message. Draft your email and use merge tags like {First Name} to pull in personalized details from your sheet.
Step 5: Connect your Google Sheet
Click the GMass button (next to the “To” field) and choose “Connect to Google Sheet.” Select your spreadsheet and the sheet containing your list.

Step 6: Send with GMass
Once your email is ready and your sheet is connected, click the GMass button to send.
Within a 7-day free trial, you can send up to 50 emails per day using this method. Unlimited email sending is available starting at $25/month.
Related: How to Hide Recipients in Gmail
4. How to send mass email in Outlook using mail merge
This method is best for: Personalized messages sent from a desktop
Limitations: Desktop-only, setup is a bit clunky, no built-in tracking
Outlook’s Mail Merge feature lets you send customized emails to a list of recipients by connecting Word and Excel via Outlook. It’s not the most intuitive method, but it works well for office-style communication when you need some personalization.
Here’s how to do it.
Related: How to Send Mass Email in Outlook
Step 1: Draft your email in Word
Open Microsoft Word and write out your email message.
If your email includes images or GIFs and you want to see how it’ll look in an inbox, go to the View tab and switch to Web Layout.
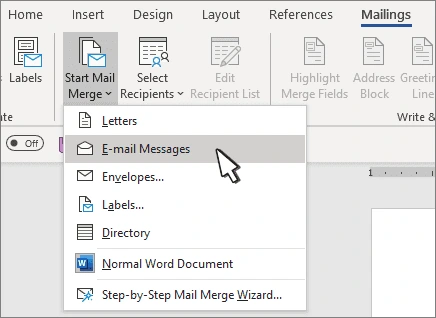
Step 2: Start Mail Merge
In Word, go to the Mailings tab, click Start Mail Merge, and choose E-mail Messages from the dropdown.
Step 3: Select your recipients
Click Select Recipients under the Mailings tab.
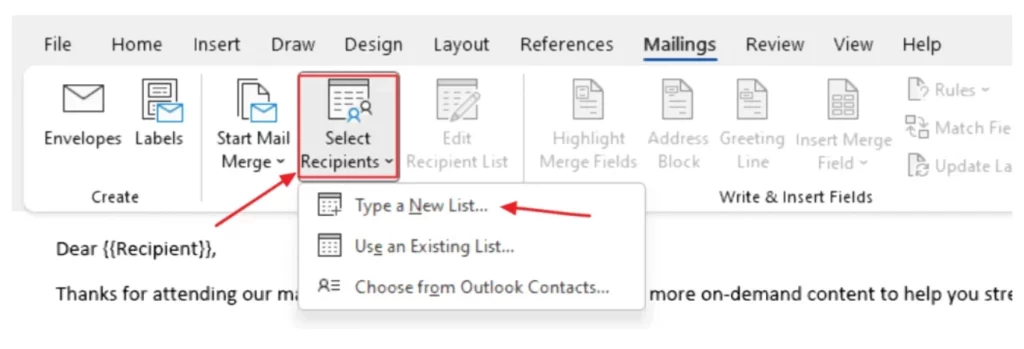
You’ll have three options:
- Type a New List: Manually enter contact details
- Use an Existing List: Upload an Excel spreadsheet with columns like First Name, Last Name, and Email Address
- Choose from Outlook Contacts: Use email addresses already saved in Outlook
Tip: If you're creating a new list, don’t forget to include an “E-mail Address” column. You can also edit entries directly or add/delete contacts as needed.
Step 4: Personalize your email
To add a personalized opening line, click Greeting Line under the Mailings tab. After you set it up, Outlook will automatically insert each recipient’s name into the message using your selected format.
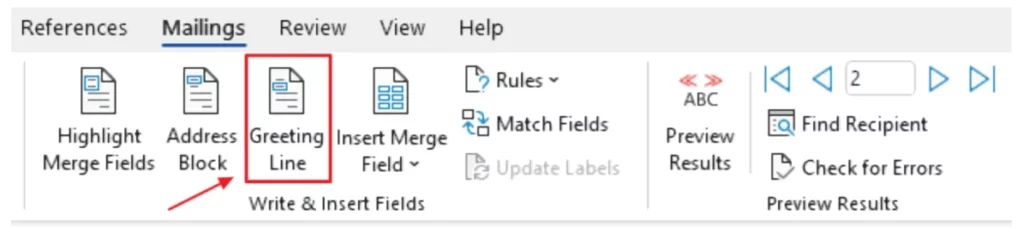
For other personalization fields, like inserting a company name or job title, click Insert Merge Field and choose from the columns in your contact list. You’ll see placeholders like «First_Name» show up in your message.
Step 5: Finish & send
Once everything looks good, click Finish & Merge > Send Email Messages. Add a subject line and hit OK to send.
Limitations of the methods above
Neither Gmail nor Outlook is designed for sending mass emails. Here’s where they fall short:
- Daily sending limits. Gmail allows you to bulk send 500 emails/day (free) or 2,000 messages to 1,500 recipients/day (Workspace). Outlook has a daily cap of max. 300 emails.
- Deliverability issues. Mass sends from @gmail.com are often blocked or filtered out; Gmail enforces a strict spam complaint rate (<0.3%). In Outlook, high volumes can hurt your sender reputation and may lead to your IP being blacklisted.
- Lack of professional branding. Neither platform offers built-in design tools. Emails are typically plain text or minimally formatted unless add-ons are used.
- No automation. If you want to follow up with those who opened (or didn’t open) your email, you’ll have to manually filter recipients and send follow-ups yourself (unless you're using a third-party tool like GMass).
- No reporting or analytics. Neither Gmail nor Outlook provides built-in performance metrics like open or click rates.
- No mobile or cross-device preview. You can’t preview how your emails will appear on different devices or browsers before sending.
If you're planning to send mass emails regularly — and want to save time, maintain deliverability, and track performance — it’s best to use a dedicated email marketing platform.
5. How to send mass email using an email marketing platform
The method is best for: Scalable, professional campaigns with automation, tracking, and better deliverability
Limitations: You’ll be subject to the sending limits of your chosen platform’s pricing plan
An email marketing platform gives you much more control over your mass emails than Gmail or Outlook.
They makes it easy to design branded emails, segment your contacts, track performance, and automate follow-ups within a sleek, simple interface.
This section will use our platform, Brevo, as an example. Note that you can also apply most of the following steps to other email marketing tools.
Step 1: Create a free Brevo account
Sign up for a free account to get access to the core Brevo functionality. You can send up to 300 emails per day on the free plan (no contact limit).
Step 2: Import your contact list
Upload your contacts as a CSV file or import them directly from your CRM. If you don’t have a mailing list yet, you can create a lead capture form with Brevo, too.
Step 3: Create a new email campaign
Click “Campaigns > Create campaign > Email > Regular.” Give it a name and proceed to the setup process.
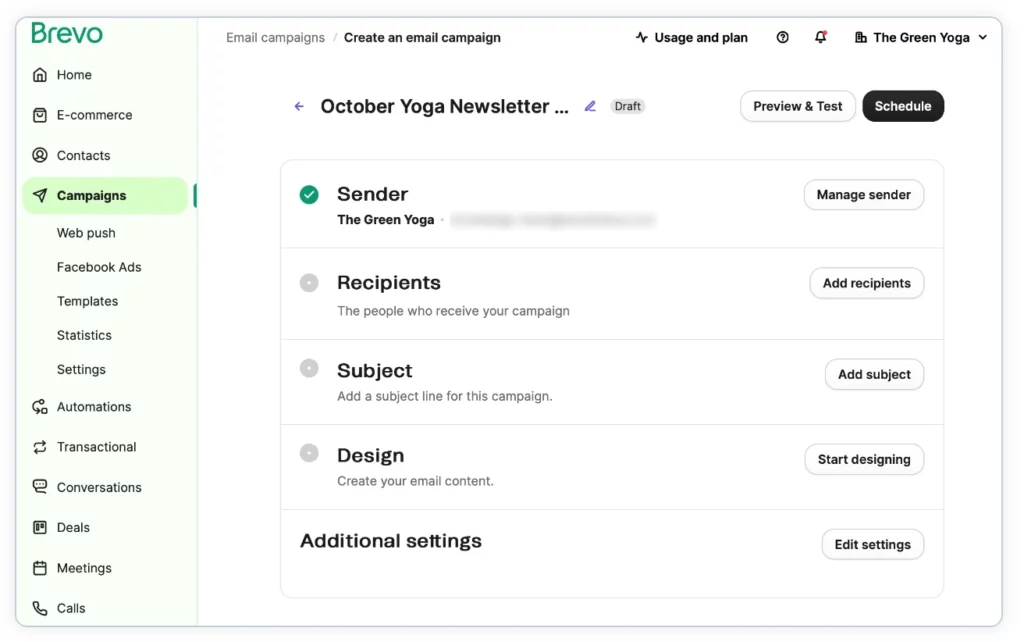
Step 4: Select recipients
Open the Send to drop-down and pick the lists or segments that include the contacts you want to target. You can select as many as you need across different tabs — perfect if your audience is split into multiple groups.
Step 5: Add a subject line
Type a short, clear description of your email in the Subject line field — this is what your recipients will see first in their inbox.
Not sure what to write? Use Brevo’s AI assistant to generate an attention-grabbing subject line in seconds.
Step 6: Design your email
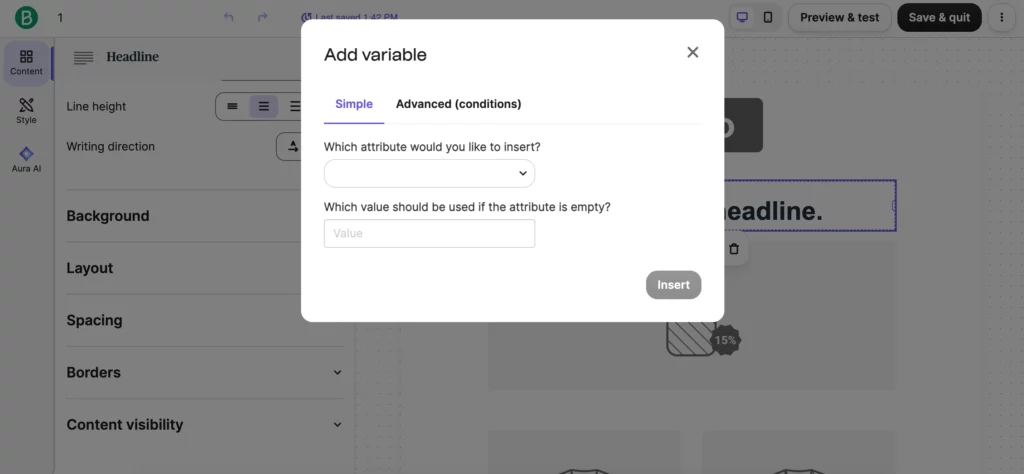
Choose from Brevo’s drag-and-drop editor, plain text editor, or code editor — or start with a pre-made template. You can customize the design, add your logo, insert buttons, images, and personalize it with dynamic variables.
To personalize your email, click the {} icon next to the text you want to customize. A window will pop up where you can choose which contact attribute to insert and set a fallback value in case the attribute is missing.
Step 7: Preview and test
Use Brevo’s built-in preview tool to see how your email will look across devices. You can also send a test email to yourself before going live.
Step 8: Schedule or send your campaign
Choose whether to send immediately or schedule for later. Brevo also offers “Send at the best time” based on your audience’s engagement history.
Best practices for sending mass emails
Follow these best practices to stay out of spam and land in the primary tab when you send a mass email.
1. Use a reliable email service
If you choose to use a dedicated email marketing platform, mind the reputation of your chosen provider. Some platforms are known for hosting spammers or using low-quality shared IPs, which can hurt your deliverability even if you’re following the rules.
Stick with a reputable mass email service provider like Brevo that prioritizes sender reputation, enforces anti-spam policies, and offers proper email authentication tools.
2. Keep your list clean
It all starts with how you source your email list. To avoid landing in the spam folder, build your list the right way from the beginning:
- Get permission: Always use opt-in forms to collect emails. A double opt-in process, where users confirm their subscription, is even better.
- Be transparent: Let your subscribers know what they’re signing up for. Whether it’s newsletters, offers, or updates, make sure they’re clear on what content to expect.
- Let them unsubscribe: Include an unsubscribe link in all your emails. It will keep you compliant with new requirements from Google and Yahoo for bulk email senders and help you maintain an engaged mailing list.
- Regularly clean your list: Over time, some emails will become outdated or inactive. Periodically clean your email list to remove these unengaged contacts. Keeping a fresh list helps you maintain a solid sender reputation.
These steps don’t just help you stay GDPR-compliant but also reduce the chances of users flagging your emails as spam.
3. Maintain a good sender reputation
Your sender reputation is like a trust score that email providers assign to you based on your sending behavior. It impacts whether your emails land in inboxes or get flagged as spam.
To maintain a positive reputation, keep an eye on these:
- Authentication: Set up SPF, DKIM, and DMARC protocols to verify you're a legitimate sender.
- Open rates: High open rates show that people are engaging with your emails. Make sure you're sending relevant content that your audience cares about.
- Bounce rates: A few bounces are normal, but a high bounce rate means your list needs cleaning. Regularly update it to remove invalid emails.
- Spam complaints: If too many recipients mark your emails as spam, your sender reputation will take a serious hit. Always ensure your content is wanted and useful.
In sum: How to send mass email
Here's a summary of the five methods for sending mass emails as outlined in this article:
- Gmail with BCC: Suitable for small, informal messages to a handful of recipients. However, it lacks personalization, tracking, and scalability.
- Gmail with built-in mail merge: Allows for personalized messages to a small-to-medium list. It offers limited formatting and tracking features.
- Gmail with third-party mail merge: Enhances personalization and tracking for medium-sized lists. These tools often provide better formatting options but may come with additional costs.
- Outlook with mail merge: Ideal for personalized emails to a moderate number of recipients. It offers more formatting options than Gmail but still lacks advanced tracking.
- Email marketing platforms (e.g., Brevo): Designed for sending professional, scalable email campaigns. These platforms offer advanced personalization, segmentation, tracking, and compliance with privacy regulations.
Each method has its strengths and is suited to different needs, from simple communications to email marketing campaigns.