The new anti-spam regulations by Gmail and Yahoo! are here. Now, you have to make it easy for users to unsubscribe from your marketing messages to win the email servers’ good favors.
Simply adding an unsubscribe link in the message content is no longer enough. So what’s the right way to do it?
Let’s explore not one but two methods of adding an unsubscribe link to your emails.
… But only one of them will keep you 100% compliant with the updated regulations.
The requirement to enable one-click unsubscribe
Since February 2024, Gmail and Yahoo! are enforcing new sender requirements to combat spam. One of the requirements is enabling easy unsubscription — so that users can opt out of marketing messages any time.
Existing anti-spam laws are more relaxed about it,but the two ESPs require senders to implement one-click unsubscribe. It should remove the subscriber from the mailing list as soon as they click the unsubscribe link.
Failing to comply leads to increased spam rates and poor email deliverability.
Find here everything you need to know about sending mass email in Gmail.
How to add an unsubscribe link to an email
Step 1: Enable a list-unsubscribe header
A list-unsubscribe header is the type of unsubscribe link displayed right in the email header as the name suggests.
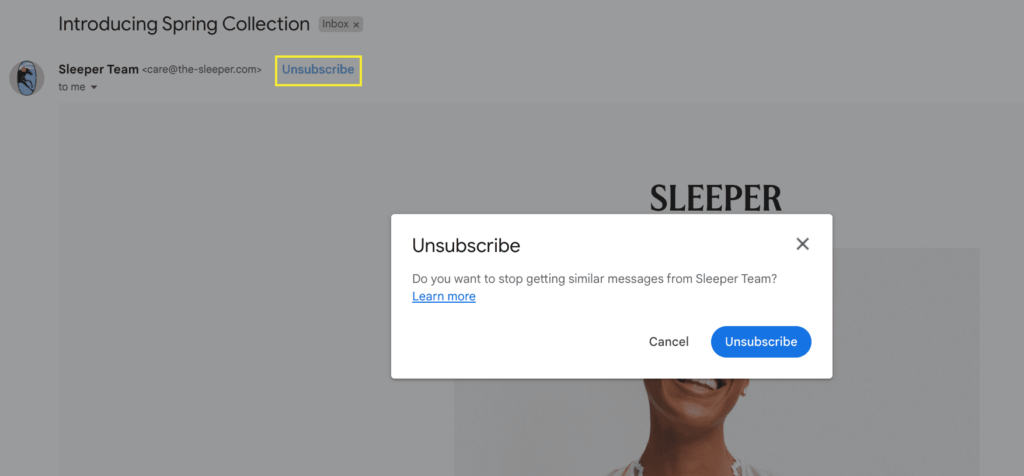
The new, one-click unsubscribe functionality in Gmail
Including this button in your bulk email campaigns is now obligatory, according to the new Gmail and Yahoo! Mail sender requirements.
Reliable third-party email providers like Brevo have the list-unsubscribe header enabled by default — so you don’t have to do anything.
Important to note: At the moment, the most popular methods of implementing List-Unsubscribe headers are mailto and HTTP/URL unsubscribe links.
- The mailto method is you setting up a dedicated email address to which unsubscribe requests are sent. This is done within your email service provider (ESP).
- The HTTP/URL method is a link the email recipient clicks and a landing page opens where they confirm they want to unsubscribe.
Nonetheless, Google states that none of these methods meets the one-click unsubscribe requirement.
“List-Unsubscribe headers unsubscribe users directly by removing them from the mailing list. Other types of one-click unsubscribe, such as mail-to and URL unsubscribe links, don’t meet our one-click unsubscribe requirement.” — from Google’s Email Sender Guidelines FAQ
The two methods are still supported by Gmail (with no plans for being deprecated), so don't you worry. Senders have until June 1, 2024 to switch to the one-click unsubscribe model in promotional messages.
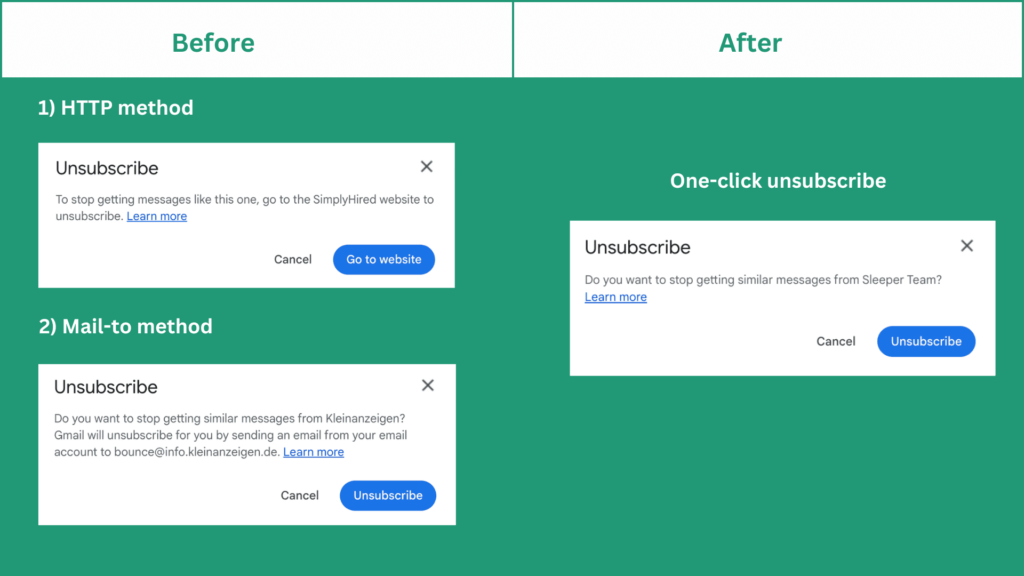
You can spot the differences in Unsubscribe popup messages depending on the method used
How do you add the list-unsubscribe header manually if you send emails directly through your own SMTP server?
Simply add the following two fields in the header of your outgoing messages:
List-Unsubscribe-Post: List-Unsubscribe=One-Click
List-Unsubscribe: <https://example.com/unsubscribe/example>
The method is valid both for Gmail and Yahoo! Mail.
To confirm you’ve successfully activated the one-click unsubscribe, look for these headers in the code of your outgoing emails:
Step 2: Add an unsubscribe link to the email footer
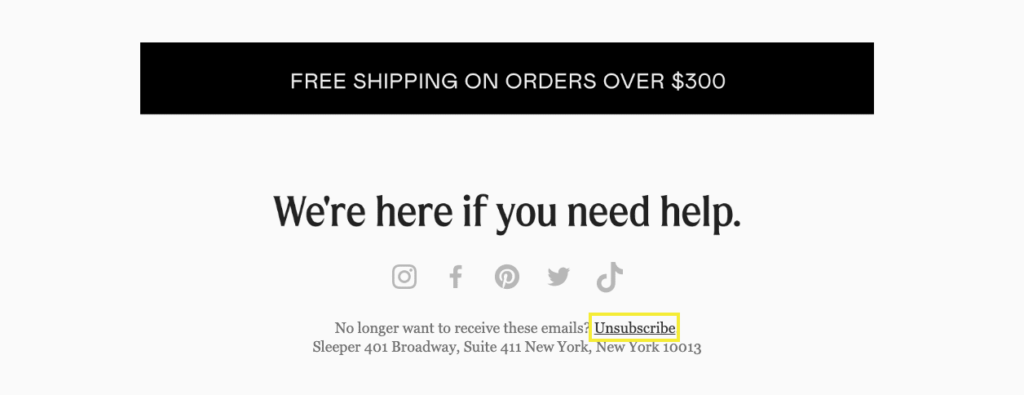
An email unsubscribe button can be placed anywhere in the email template, but the footer is probably most popular.

Example of an unsubscribe link placed in the email footer
Important to note: There’s no requirement to have an unsubscribe link in the email body. However, there are several benefits to including it alongside the list-unsubscribe header.
- Having an unsubscribe link both in the header and footer improves the user experience. If someone wants to unsubscribe, they'll do it anyway. And the easier it is to find the hyperlink, the better. The other option is to get marked as spam.
- You can use the link in the footer to send users to a page where they can configure their subscription preferences. Maybe they only want to opt out of certain types of messages and not communication altogether. This is a great way to keep your mailing lists updated and relevant.
So how do you add an unsubscribe link to the email footer? There are two ways.
a. Using a drag-and-drop editor
If you use a quality email service provider, the link is already in the templates by default. In Brevo, the unsubscribe link is added automatically.
You can, however, customize your unsubscribe link’s appearance (link text and link icon) using Brevo’s drag-and-drop editor.
b. Using an HTML or Rich Text editor
If you create your emails using Brevo’s HTML and Rich Text editors, you can manually insert an unsubscribe link in your email campaigns. Just insert the following code in the email body:
<a href="{{ unsubscribe }}">Click here to unsubscribe</a>
You can configure the unsubscribe page in the campaign settings:
- Go to Additional settings at the bottom of the page
- Click Edit settings
- Scroll till you see the Subscription section and click Use a custom unsubscribe page
- In the drop-down menu, either select the existing page or choose to create a new unsubscribe page
- Save the settings, and you’re all set
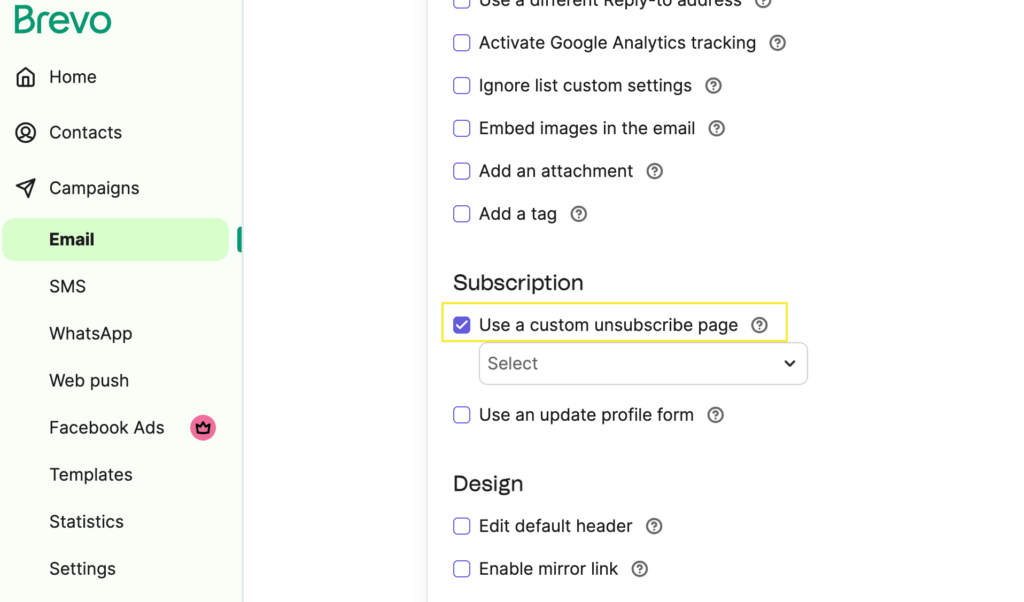
Selecting a custom unsubscribe page in Brevo