
Most WooCommerce store owners hit this same wall eventually. The storefront looks professional, the product pages are on-brand, the checkout flow feels properly configured, and then a customer places an order, and all that consideration falls apart because of a confirmation email that looks like a system notification from 2010. Plain text, no logo, no colour, nothing that connects it back to the store they just bought from moments earlier.
This gap is a genuinely bigger issue for WooCommerce than it is for other hosted platforms, and it is worth being specific about why rather than treating it as a poor design complaint. WooCommerce's default transactional emails ship with limited design and customization options out of the box, which is a documented limitation rather than just your personal negative opinion about outdated design.
- The Problem With WooCommerce's Default Email Templates
- 6 WooCommerce Email Templates Every Store Should Customize
- How to Replace WooCommerce's Default Emails With Branded Templates
- Personalizing WooCommerce Emails With Variables
- How Brevo Helps You Build and Send WooCommerce Email Templates
- Comparing WooCommerce Email Options
- Why This Gets Overlooked During a Store Build
- Final Word
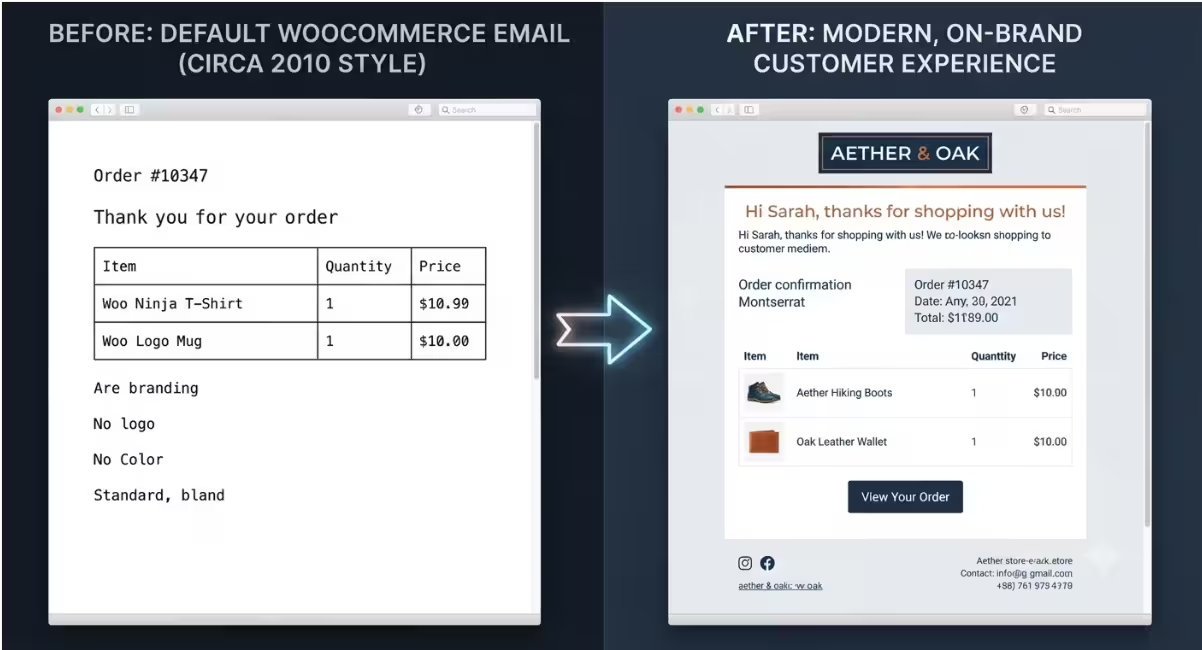
WordPress and WooCommerce give store owners huge control over almost every part of the storefront, from theme code to page builders to custom checkout flows, but email is the one segment that is easy to overlook until a customer mentions it or a support ticket comes in asking why the confirmation looks so broken.
This guide shows a template for every sort of email that a WooCommerce store sends out, as well as the exact steps to make that the new default template for every type of email without the need to touch a single line of code along the way.
Additionally, the guide reviews all the different personalisation variables available in WooCommerce, since these are likely to differ a little from what an email guide might suggest, along with a side-by-side comparison of the real-world choices at hand once the decision to fix this is finally made.
The Problem With WooCommerce's Default Email Templates
WooCommerce does come with some standard transactional emails out of the box, such as order confirmations, processing orders, completed orders, plus a couple of account-related ones, including a new account registration (with reset password) email. They kind of do the basics in that they reliably send and feature the required information. What they don't do well is look like anything beyond a generic system notification that could belong to any store running the plugin.
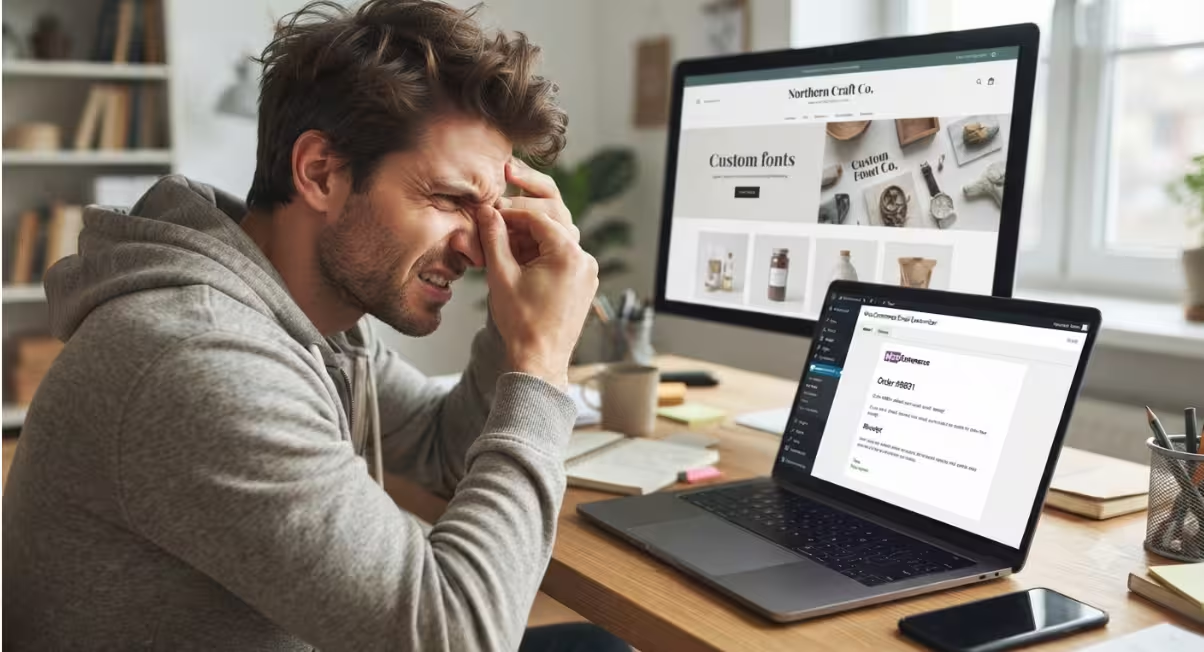
The tools that are provided within WooCommerce when it comes to customising these emails really are basic. This is not an opinion, but rather a widely documented constraint of WooCommerce's standard email system. Store owners may be able to alter the header with a brand colour, apply their own logo, and amend some boilerplate text via the WooCommerce settings section. However, there is no real-time drag-and-drop system for building email layouts, no integration to, for example, send product recommendations based on a user's recent activity or history, and no way to make an email truly distinguishable from what most other WooCommerce websites are probably sending themselves.
While this is true for Shopify store owners, it is far more important for those who use WooCommerce. The reason comes down to the extent of store and storefront control each platform gives its store owners by default.
WooCommerce store owners typically have greater control over how their storefront looks by building fully custom themes and layouts with WordPress instead of relying on a theme editor. This means the difference becomes increasingly more visible when an email looks nothing like the website where the purchase was made. The contrast between the email and the site becomes more obvious as more effort is put into the storefront, while plain-text emails appear to be an afterthought in the overall design.
6 WooCommerce Email Templates Every Store Should Customize
Different emails do not serve the same purpose, which is a good enough reason why all emails should not share the same template. An order confirmation provides assurance that a purchase was submitted properly. A shipping update provides certainty. A welcome email introduces your store, while a back-in-stock email encourages customers to return. Each email reaches your customers at a different point in their journey, with each serving a different purpose. Using the same template means missing a unique opportunity to build trust, extend your brand, and encourage repeat purchases.
The good news is that you do not need to redesign dozens of templates. A few well-designed templates can act as the common denominator, providing a consistent experience across all core interactions throughout the buying journey. Customizing a set number of your most-used email templates will carry the impression of your store right into your customer's inbox, provide the information they need at the right time, and ensure everything happens naturally and with intention rather than automation.
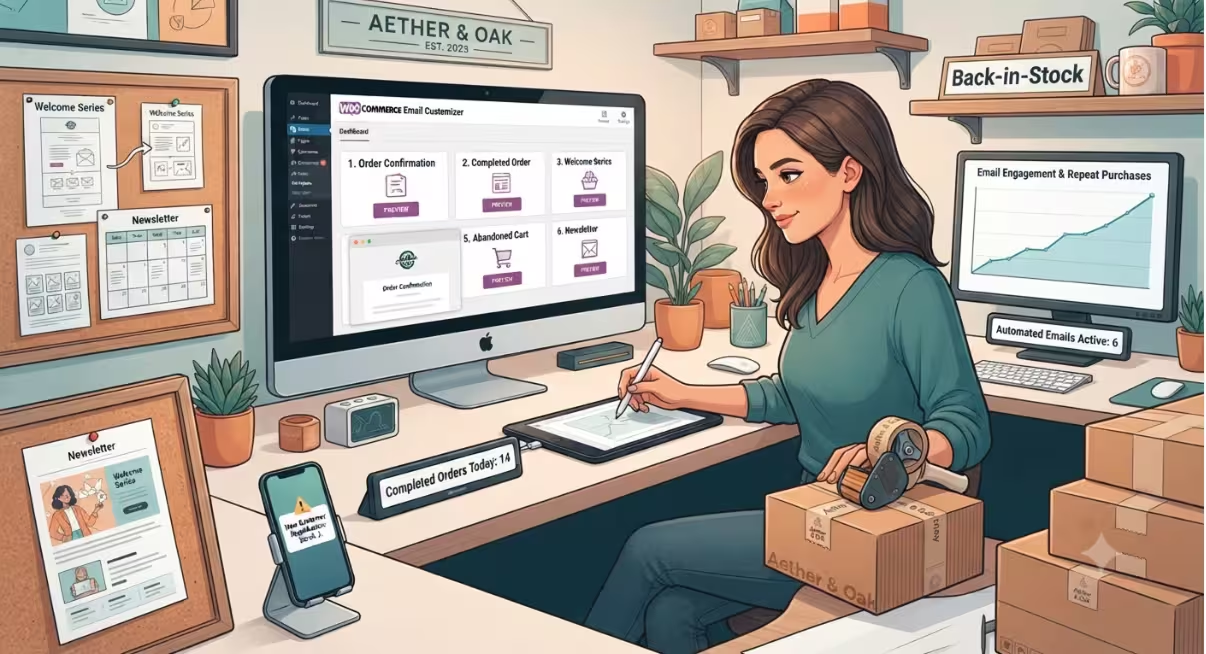
Below, you will find out the top six WooCommerce email templates that every store should customize first and use as the foundation for a professional email strategy. Together, these templates can improve the customer experience, increase engagement, and encourage repeat purchases that build long-term loyalty.
1. Order Confirmation / Processing Order
This email is the first one your customer checks after they check out. It's triggered by the "Processing Order" event specifically, just after the first fulfilment step is taken, i.e., the moment the order is confirmed. This email must have elements like the order number, products, and total value and must be differentiatingly put in the template; they're what your customer opened the email for immediately after checking out.
Anything salesy belongs well below it, away from competing attention and view. Mapping this event correctly in the plugin doesn't go amiss either. Imagine the scenario where a store accidentally maps the custom template to the wrong trigger event and sends what should be a confirmation email, with the associated content, when the customer was expecting a different type. That is confusing for the recipient.
Getting the order confirmation right:
- No scrolling at all to reveal the order number, items, and total.
- Support contact information should be there, not just at the foot of the page.
- No promotional content competing with transactional details.
- Ensure this is mapped to the Processing Order trigger, not Completed Order.
2. Completed Order / Shipping Confirmation
This email is triggered by the WooCommerce "Completed Order" event, once fulfilment actually happens. Therefore, this should be a totally separate email from the order confirmation and deserves a separate template rather than the content and layout of a confirmation email.
When you combine these two, you lose the opportunity for a second legitimate email open, an opportunity that most merchants undervalue.
Shipping confirmation is an important email too, and it should address concerns about shipped items. As well as stating an order has been shipped, the confirmation email should reassure customers that everything is running to plan and answer the questions they are most likely to have before they need to contact support.
A clear tracking link, estimated delivery date, shipping address, and carrier reference make the email genuinely useful, as opposed to just another message arriving in the inbox.
Reinforce your brand through consistent design and a friendly tone, without drawing focus from the delivery. Do not clutter the email with promotional material, as the customer will be opening it to check the status of their order above all else.
This well-designed email builds confidence, reduces needless support inquiries, and keeps customers involved until their order arrives, making it one of the most valuable transactional emails for customer experience that your WooCommerce store sends.
- A working tracking link must be included in every notification, not on demand.
- A realistic rather than an over-optimistic delivery estimate.
- Visually different enough from the confirmation email so that it doesn't create a feeling of repetition.
- Triggered specifically from Completed Order, not reused from Processing Order.
3. Welcome / New Account Email
The default new-account email from WooCommerce isn't much better than a transactional send. It simply confirms the account's existence, occasionally provides a temporary password, and offers little else. A branded version would do much more: introduce the brand in two lines, set expectations about future emails, and give the customer one clear first action to take.
It could easily become a welcome series instead of a short transactional email for stores with more brand story than a single email can tell. An account-creation-triggered email works well for simpler stores with a narrow catalogue, while a two- or three-email series spread over the first week might be better for brands trying to add more context, a founder story, or their values before the first sales push reaches people's inboxes.
The right welcome email:
- A one-line brand story, not the full company history.
- One obvious next action, not multiple conflicting options.
- Do not hard sell yet; that comes later in the sequence.
- If there is too much for one email, use a short welcome series instead.
4. Back-in-Stock Alert
This opt-in template, rather than a broadcast one, is what helps this convert unusually well. It appears as a "Notify Me" button on out-of-stock products, ensuring that when a customer wants an item that is unavailable, they receive a back-in-stock email as soon as it is back in stock instead of a generic newsletter.
Because the original interest came from the customer, rather than a typical advertisement or newsletter, urgency copywriting or discounts may actually reduce effectiveness. Simply telling them the product is back and providing a purchase link is often all that is needed.
Getting the back-in-stock alert right:
- Keep it simple: the item is back, include a link to buy, and nothing more.
- Send it the moment inventory updates instead of delaying it in a batch.
- Include a "Notify Me" button on all out-of-stock product pages, not just bestsellers.
- Do not stack other promotions into this email.
5. Abandoned Cart Recovery
Abandoned cart recovery emails help customers complete the purchase they were already intending to. These emails often boast higher open rates and fewer unsubscribes compared to generic marketing blasts, a likely reason being that they are triggered by a particular customer action. Therefore, it is important to send the right email at the right time that relates to the same products they recently showed interest in and making is as easy as possible to buy and complete the order.
A good abandoned cart sequence can gain back some of the lost sales while at the same time increasing the customer's experience in purchasing online if emails are relevant to what they intend to be looking for.
In general, the email should focus on the exact product and price left behind in the cart. Any discount should appear later in the sequence rather than leading with it, and the email should maintain a single, clear call-to-action instead of competing buttons.
The timing of each email is also important. If you send your first email too soon after your user abandons their cart, they might feel that you have come across a bit too strong. Waiting too long, however, will likely mean that the WooCommerce customer might already have bought elsewhere or may have simply lost interest.
Your product photos, prices, and a direct link to the items in the cart should be clearly visible to reduce friction and make their return as easy as possible. Keep your copy simple; remember to focus solely on encouraging your customers to complete their purchase instead of bombarding them with multiple offers or unnecessary information.
Aim only to encourage them through reminders and reassurance, without trying to pressure them. An effective automated abandoned cart series has been consistently demonstrated to recover lost revenue while helping to improve the user experience and strengthen the long-term trust your customers place in your WooCommerce store.
6. Newsletter / Promotional
Consistency matters more than frequency. Choosing a regular weekly or monthly schedule and sticking to it is far more effective than sending emails only when there is news to share.
For WooCommerce stores, promotional emails should also look noticeably different from transactional emails sent through the same system. Customers should instantly recognise whether an email requires action or is simply a marketing update. When both look the same, transactional emails can feel promotional, while marketing emails lose credibility.
If you do not send emails frequently or on a fixed day, consistency still matters if you want to maintain strong open rates. You need to choose a weekly or monthly sending schedule and stick with it for at least a quarter so subscribers know what to expect. While maintaining that rhythm, avoid making every email purely sales-focused. Instead, include informative content such as product tips, buying guides, customer stories, or useful updates to keep subscribers engaged and support stronger long-term open rates.
Your promotional emails should also look visually different from transactional emails, making it easy for customers to distinguish marketing messages from order updates. At the same time, avoid using the same layout in every campaign. Rotate featured products, collections, educational content, and seasonal highlights to keep your newsletters fresh and encourage continued engagement without making each email feel repetitive.
How to Replace WooCommerce's Default Emails With Branded Templates
The workflow to design custom templates replacing the WooCommerce default ones with the plugin is always the same. Take your time and do not rush through the steps, or your custom template may not appear because of a missed simple step.
Once designed using the drag-and-drop editor, it will appear in your template list after it is saved. Drag your custom template from the "Deactivated Templates" column (left) to the "Active Templates" column (right) before it can be used with WooCommerce.
Only templates that appear in the Active Templates column can be accessed from the WooCommerce template dropdown in a later step. If your freshly designed template seems to have magically vanished, this is likely the simple activation step you forgot to complete.
Turn on the "Send with SMTP" option under Email Options to receive tracking for opens, clicks, and bounces, which WooCommerce on its own will not provide, no matter how the template has been designed. Since this also enables SMTP sending and email tracking, it requires installing the Pro add-on, as these features are available only in the premium version.
Email events: Make sure you review the variety of events available in WooCommerce before settling on a few email templates. Transactional emails are not all designed for the same purpose and therefore should not share the same design. Order confirmations, shipping confirmations, completed orders, and welcome emails should each be mapped to their own email template instead of assigning the same template to every event.
Steps to Replace the Default Templates
Step 1: Design your email template
Design your template using the drag-and-drop editor, rich text editor, or HTML editor depending on the level of design control desired. Add your logo, brand colours, and typography to the editor, include the required personalization variables for that email type, and click Save after you have finished the design.
Step 2: Activate the template
After saving it, move the desired template into Active Templates from the Deactivated Templates page. Any templates in Deactivated Templates will not become available inside WooCommerce when you try to assign them to events.
Step 3: Enable SMTP sending
Enable Send with SMTP under Email Options if better deliverability along with open, click, and bounce tracking is desired. This gives you visibility into email performance that WooCommerce's regular sending option does not provide.
Step 4: Set the email event
Choose the WooCommerce event you want this email to trigger. This could be Processing Order, Completed Order, Cancelled Order, Refunded Order, Customer Note, New Account, or any other supported event. All of these events are configured individually instead of through one universal setting.
Step 5: Assign the branded template
Open an individual event and assign your custom template instead of the default WooCommerce email template. Double-check that it has been assigned correctly before moving to the next event.
Step 6: Insert personalization variables
Insert any variables such as the customer's name, order number, total, shipping, and tracking. Double-check that all variables are used correctly and that no typing errors were made because the template may display the variables as simple text instead of completing them with your customer's details.
Step 7: Check the layout and the flow
Check how your email appears on your phone or on your tablet. Check if your brand, buttons, spacing, fonts, images, and key information are there, seen clearly, and easy to read. Some designs do not respond properly on smaller or bigger devices.
Step 8: Place a test order through WooCommerce
Place a test order on the WooCommerce Store where you installed and assigned the template, since for your email to work, live access to your customer's data and various other variables would be needed. Only by doing the latter will you not be a chance to miss any possible issues that need to be ironed out. Check its buttons, images, tracking, and personalisation so you don't encounter issues before it goes live.
Step 9: Confirm the email trigger
Double-check that the emails are being delivered at the correct point within the customer journey. Is a Processing Order email being sent too early? Has the payment processed at the correct instance of issuing the email? Will the customer only receive a Completed Order email upon the order being completed? Are the emails triggering at an appropriate stage within the customer journey?
Step 10: Check email delivery
As we are tracking our emails using SMTP, review the open rates, click rates, bounces, and delivery of each email you have updated. Highlight when emails are bouncing so that the problems are resolved before they cause you problems on launch.
Step 11: Repeat the steps for remaining templates
Once the Order Confirmation mail is working correctly, repeat the same steps for Shipping Confirmation, Welcome mail, Back-in-Stock alerts, Newsletters, Abandoned Cart mails, along with any Transactional emails that are being used by the store.
As the plugin works alongside WooCommerce's default templates, you can opt to replace them one by one. Go if you are not interested. In most of the stores in the world, stores begin by replacing the Order Confirmation before moving on to Shipping Confirmations and other such emails, including Welcome emails, before making the shift towards Abandoned Cart emails.
Making the change one at a time brings ease in testing, which is important, and you might mess your entire system. That would mess up customer emails, as customer communication becomes difficult in these situations. Follow this step-by-step approach to replacing WooCommerce default emails with your branded and consistent templates while running your store smoothly behind the scenes.
Personalizing WooCommerce Emails With Variables
In WooCommerce, you can customize using variables enclosed in brackets that use capital letters. These are like a reference to the contact attributes you have in your integrated platform. For instance, the variables {ORDER_ID}, {FIRSTNAME}, {ORDER_PRICE} automatically include the order number, customer's first name, or total price of their order in the sent email, depending on where they are placed in it.
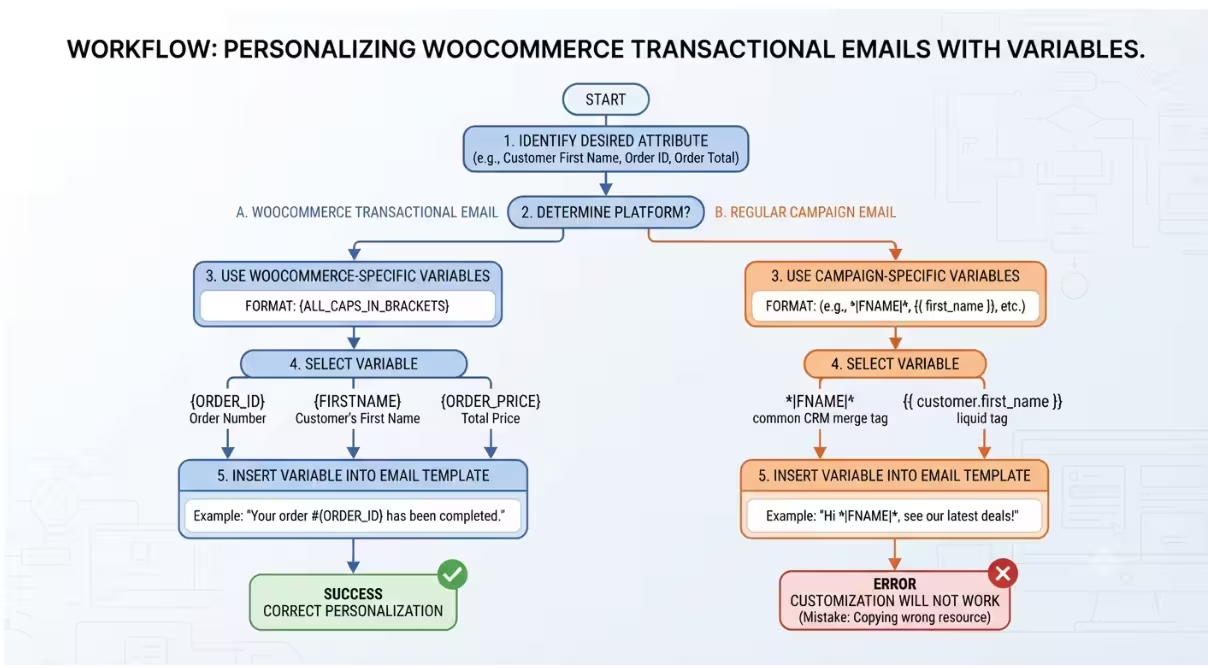
Unlike these, regular campaign email templates may use different variables. Copying variables from other help resources is a common mistake, and this will often prevent customisation from working. An example of a correctly phrased email based on a WooCommerce variable is: "Your order #{ORDER_ID} has been completed."
| Variable | Renders As | Common Use |
|---|---|---|
| {ORDER_ID} | Order number | Subject lines, confirmation emails |
| {FIRSTNAME} | Customer's first name | Greeting line |
| {ORDER_PRICE} | Total order amount | Confirmation and receipt sections |
| {LASTNAME} | Customer's surname | Formal greetings, invoices |
| {EMAIL} | Customer's email address | Account and support references |
If you made a typo such as writing a variable in lowercase when it should be uppercase, it usually does not create an error. The variable will show up in the email as plain text; therefore, you should always test new variables on a live order after adding them and keep an eye on your templates in case any of the variables start using the wrong attributes.
How Brevo Helps You Build and Send WooCommerce Email Templates
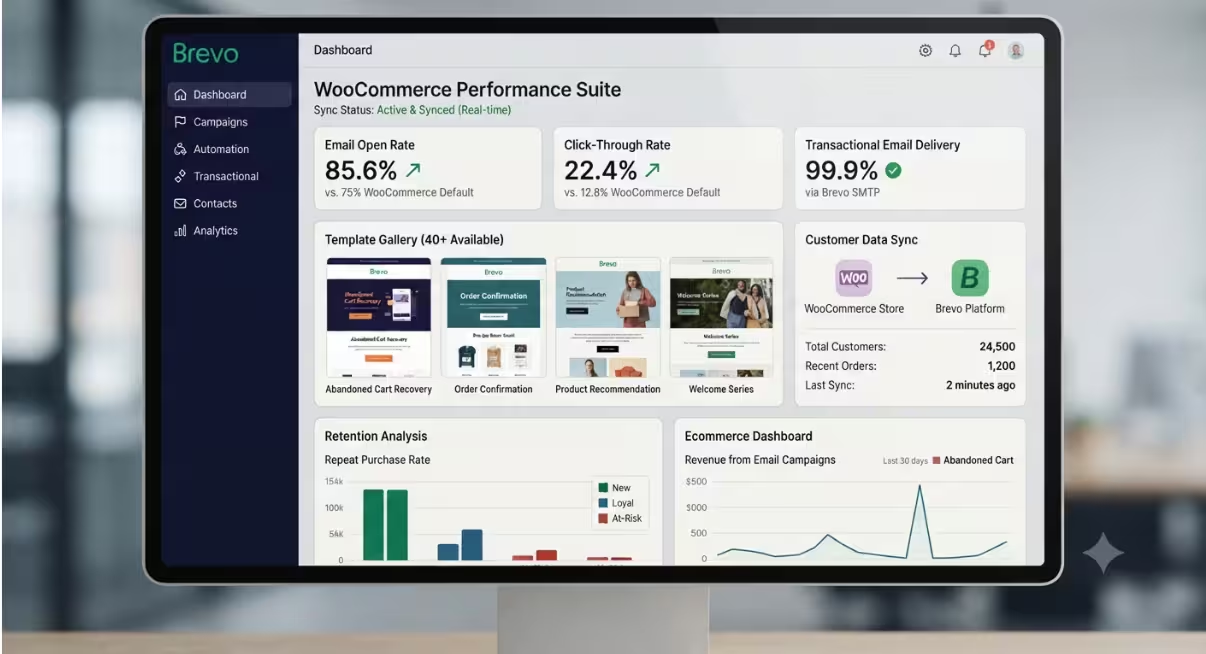
The reason Brevo ties in so brilliantly with WooCommerce is that it really attacks most of WooCommerce's problem points about their email system. It has over 40+ pre-designed email templates that users can play around with when composing. This means users do not have to choose between rich-text, HTML, or drag-and-drop editors and convenience. Plus, with the inclusion of an SMTP relay, they will easily solve most of their transactional email sending and delivery issues too.
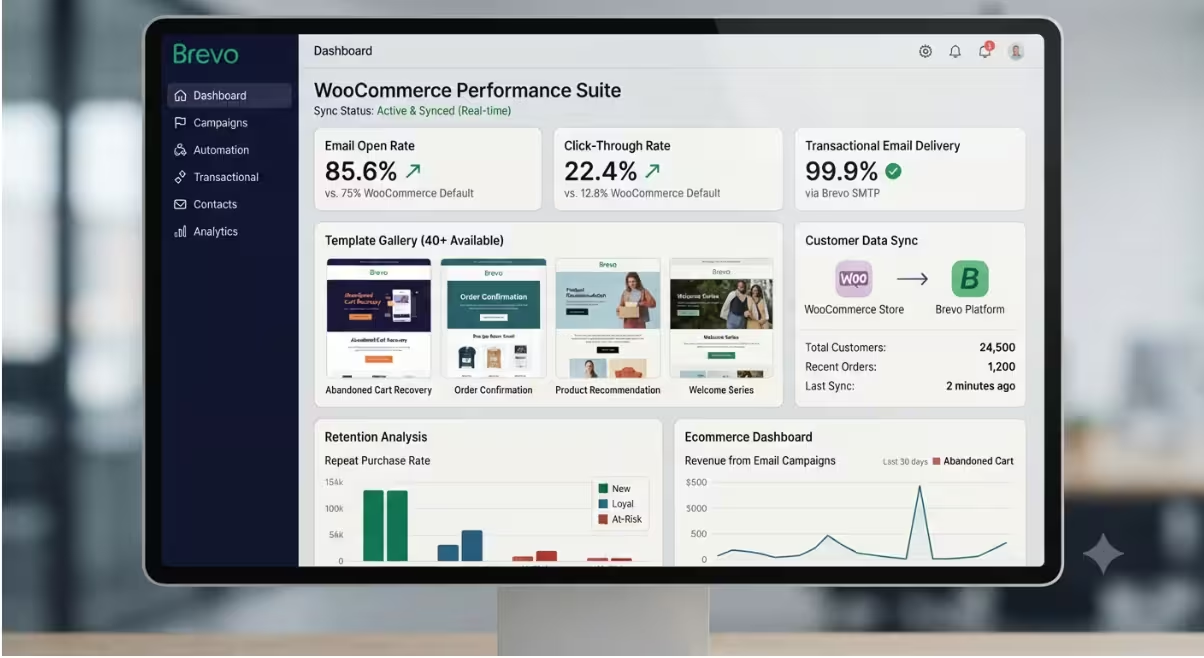
This will also record how many items out of each batch opened their emails, clicked them, or even bounced. Even if you still keep the default templates, any sends through Brevo will offer you increased visibility. You will not get that from WooCommerce's basic-level native features.
Your customer data and order information immediately sync, eliminating the need to constantly re-download CSVs to keep customer record-keeping up to date between different accounts. Now, including an ecommerce dashboard, product insights, and retention analysis, means you can track and segment customers by how you choose between groups based on prior purchasing decisions without manually attempting to build monster spreadsheets each time.
Comparing WooCommerce Email Options
| Approach | Design Control | Deliverability Tracking | Setup Effort |
|---|---|---|---|
| Standard WooCommerce | Minimal | None | None, works out of the box |
| Custom HTML | High | Depends on SMTP setup | High, requires developer time |
| Brevo Plugin for WooCommerce | High, drag-and-drop editor | Full open, click, and bounce tracking | Low, simple event setup |
WooCommerce's native order emails require no setup or maintenance to send. But they barely allow for design, let alone deliverability insights. This is something users start to notice as their businesses grow.
Building completely customized email templates in HTML gives maximum design freedom but involves additional developer support both to build them and to maintain email reputation through SMTP.
Brevo provides a great middle ground that combines template design freedom, delivery ease, and tracking, all without custom code headaches. Growing stores will quickly reach a stage where it becomes a better option from both perspectives and continues providing value even as they scale into much larger stores.
Why This Gets Overlooked During a Store Build
When agencies or developers build a WooCommerce store for clients, they usually start by perfecting the parts clients see first: the homepage, product pages, checkout, and mobile responsiveness. Transactional emails rarely make it onto the first checklist because they do not usually appear during a website walkthrough or a design review.
By the time the issue is noticed, it is often because someone shared a screenshot of a broken confirmation email or a team member placed a test order and discovered it firsthand. The problem is addressed reactively, even though it could have been prevented with just five minutes of plugin installation. As a result, this gap often slips through on otherwise well-built and polished stores.
Final Word
While WooCommerce offers incredible customization flexibility for almost every aspect of your online store, email is one area where it only covers the basics. Thankfully, fixing it does not require calling your web developer or searching through technical forums. Simply replacing the default order confirmation with a branded template is a major step toward closing the gap between your polished storefront and forgettable emails, reinforcing your brand after every purchase.
Using Brevo's free plugin is one of the fastest ways to bridge that gap. Install it and replace your first transactional template. Since templates are assigned by email type, such as Welcome, Order Confirmation, and Shipping Confirmation, you can gradually update your entire email library over time instead of waiting until everything is complete before seeing results.
There is also a subtle long-term benefit beyond changing a single template. Every welcome email, order confirmation, shipping update, and notification reinforces your brand. On the other hand, a generic-looking email that lacks your branding can quietly weaken the customer experience. If your store processes 1,000 orders each month, that means 1,000 branded touchpoints or 1,000 missed opportunities. Those repeated interactions are too valuable to ignore.
Treating transactional emails as an essential part of your overall store design rather than an afterthought creates a far more consistent and enjoyable customer experience. Once that foundation is in place, extending the same branded approach to welcome emails, back-in-stock alerts, newsletters, and other lifecycle emails becomes a natural next step rather than another project competing for your team's attention.


