
Switching from Mailchimp to Brevo doesn't mean exporting a CSV and hoping for the best. Brevo's built-in Mailchimp integration pulls your contacts over automatically, on a schedule you control. You set it up once, confirm a few details, and your list stays in sync from there.
This guide walks through the full setup, screen by screen, so you know exactly what to expect before you start.
Want to see how Brevo compare with other platforms? Check out our full roundup of Mailchimp alternatives.
At a glance
Is migrating from Mailchimp to Brevo hard? No. It's a native, plug-and-play integration — no manual exports or file uploads needed.
How long does it take? The sync itself runs in minutes. Most of your time goes into the one-time setup and cleaning your list beforehand.
Will my contacts' consent status carry over? You confirm consent during setup. Brevo won't import contacts who haven't opted in.
Can I keep using Mailchimp while I switch? Yes. The integration can run alongside Mailchimp for as long as you need.
How to migrate from Mailchimp to Brevo in minutes
Brevo's Mailchimp integration connects directly to your Mailchimp account and imports your contacts on the sync frequency you choose. There's no file to export, format, or re-upload — the integration handles the transfer for you.
A couple of things worth knowing before you set it up:
- Address fields don't map. Mailchimp stores address details (street, ZIP, and so on) as one combined field, which Brevo can't split apart automatically.
- Tags aren't imported. Brevo doesn't have a matching tag system yet, so any tags you've set up in Mailchimp stay in Mailchimp.
Neither limitation blocks the migration — you'll just want to rebuild any tag-based segmentation directly in Brevo afterward.
Before you start migrating
Create your Brevo account
Sign up on Brevo so you can access the integration. The free plan covers the setup below, or you can start on a paid plan if you already know you'll need more sending volume.
Clean your Mailchimp contact list
Brevo only imports contacts who've consented to hear from you within the last two years. Going through your Mailchimp list first — removing bounces, unsubscribes, and anyone who never actually opted in — means you migrate a list that's ready to send to, not one you'll have to clean up in Brevo afterward.
Two guides that help with this:
Set up the Mailchimp integration in Brevo
From your Brevo dashboard, click your account name, then Plugins & Integrations. Search for "Mailchimp" and select Mailchimp by Brevo — not the Zapier option — under the email marketing category.

Clicking the integration opens a short setup flow. Here's what each screen asks for.
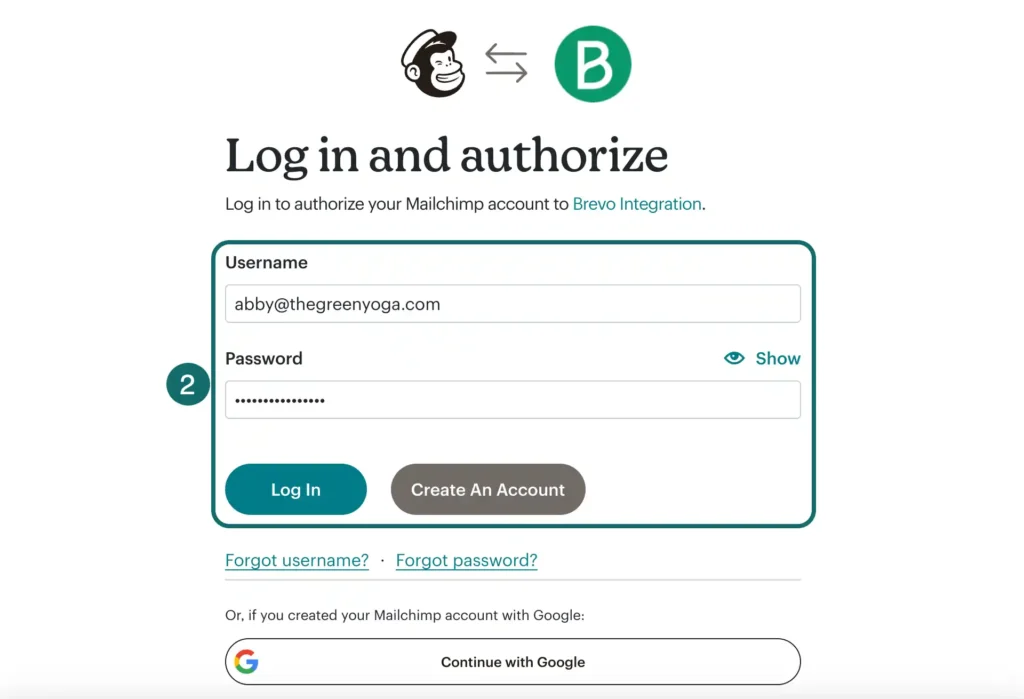
Connect your Mailchimp account
Log in to Mailchimp when prompted, and allow Brevo to access your account. This is what authorizes the sync in the first place.
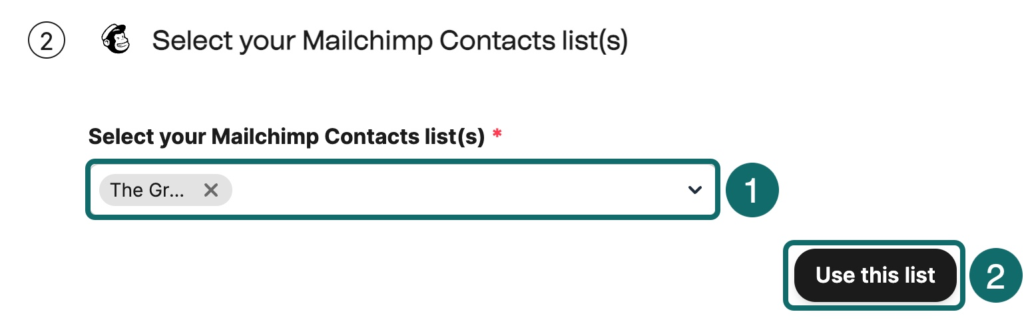
Select the Mailchimp lists to sync
Choose which Mailchimp list — or lists — you want to bring over, then confirm your selection.
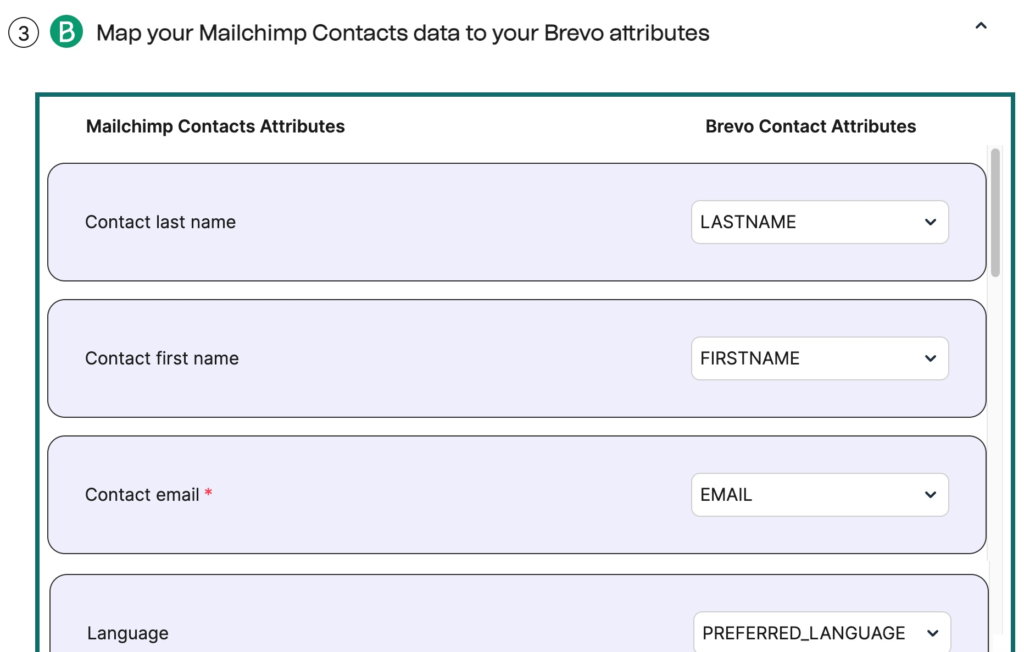
Map your contact attributes
Match each Mailchimp field to its Brevo equivalent — first name to FIRSTNAME, and so on. Email is the only field that's mandatory. If you use a custom field in Mailchimp that doesn't exist yet in Brevo, you can create it on the spot.
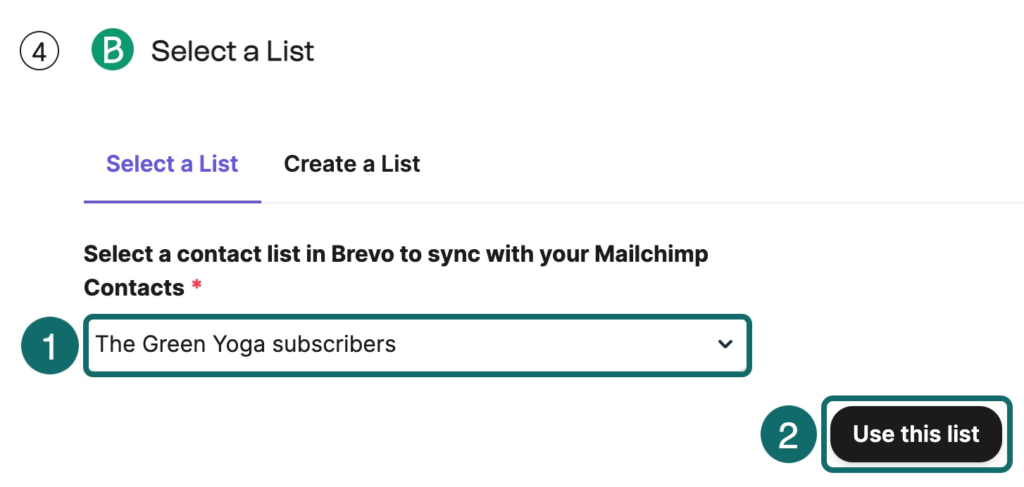
Choose or create your Brevo list
Sync your contacts into an existing Brevo list, or create a new one right from this step.
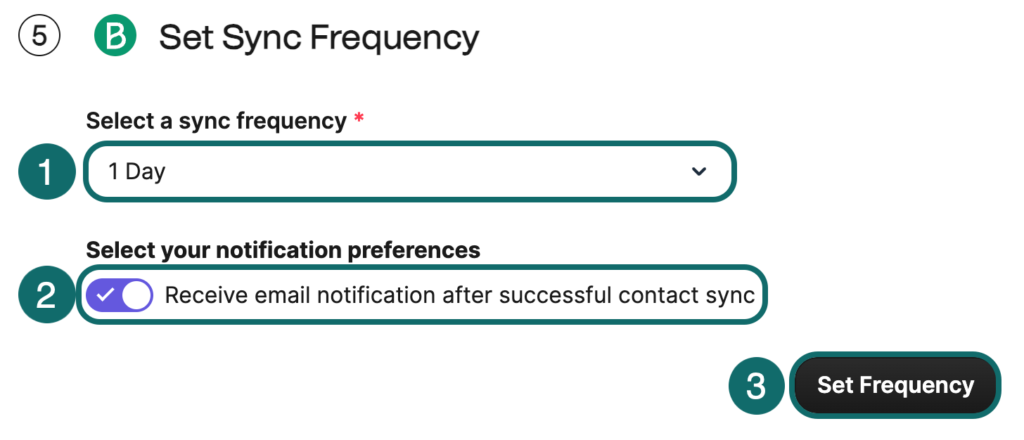
Set your sync frequency
Pick how often new Mailchimp contacts should sync automatically, and turn on an email notification for successful syncs if you want one. You can also trigger a manual sync anytime from the My Integrations page — just leave at least 6 hours between manual syncs.
Confirm contact consent
Check the box confirming that you're only syncing contacts who've opted in. If your list includes contacts who haven't — say, from a purchased list — clean it up in Mailchimp first, then restart this step.
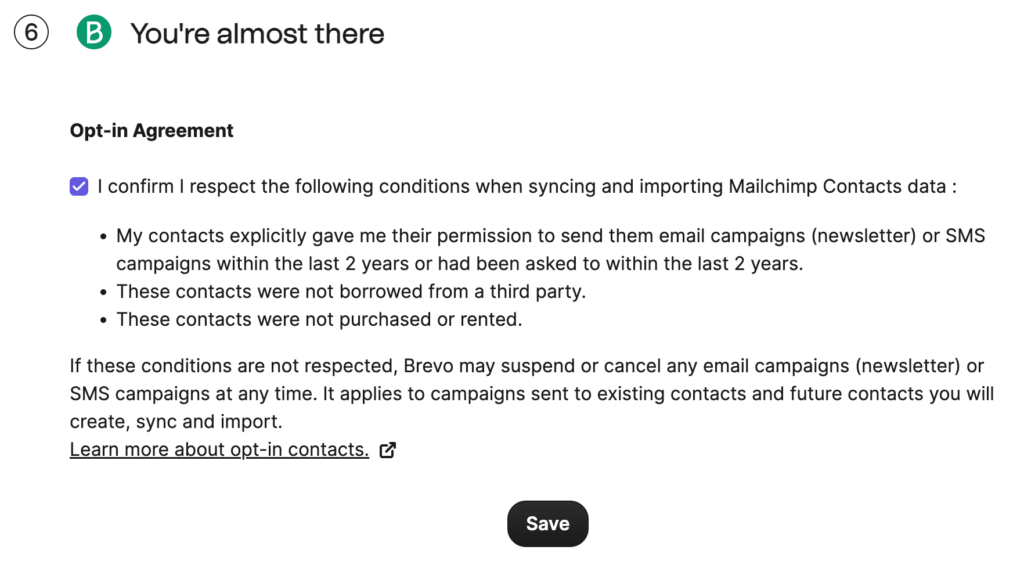
Brevo can suspend campaigns sent to contacts who never consented, so if you're not sure, it's worth double-checking this step rather than rushing through it!
Activate the integration
Click Save to activate. Your existing contacts start syncing right away — this can take a few minutes — and you'll get a notification once it's done. If you're not ready to activate yet, the integration stays saved as a draft until you are.
Check your migration report
Once the sync finishes, check your inbox for a confirmation email. It shows how many contacts migrated and which Brevo list they landed in.
To see the synced contacts yourself, go to CRM > Contacts > Lists and open the list you selected during setup.
What to do after migrating from Mailchimp to Brevo
With your contacts synced, you can start putting Brevo's platform to work:
- Segment your audience. Group contacts by behavior, location, or purchase history to send more targeted campaigns.
- Send your first campaign. Build and send email campaigns to your newly synced list. Ready to reach your whole list? Here's how to send mass email with Brevo.
- Automate your follow-ups. Set up workflows that send emails, SMS, or WhatsApp messages automatically based on what a contact does.
- Talk to visitors in real time. Use live chat to answer questions on your site or social channels as they come in.
- Manage your pipeline. Track deals and tasks alongside your contacts if you're also using Brevo's CRM for sales.
Ready to make the switch?
Migrating from Mailchimp to Brevo doesn't require a technical team or a weekend of manual work — just a clean list and a few minutes to connect your account.
If you'd rather work through the setup with click-by-click screenshots at every step, the Brevo Help Center's full Mailchimp integration guide covers the same flow in more detail.
Ready to migrate from Mailchimp to Brevo and start saving big on email marketing?


